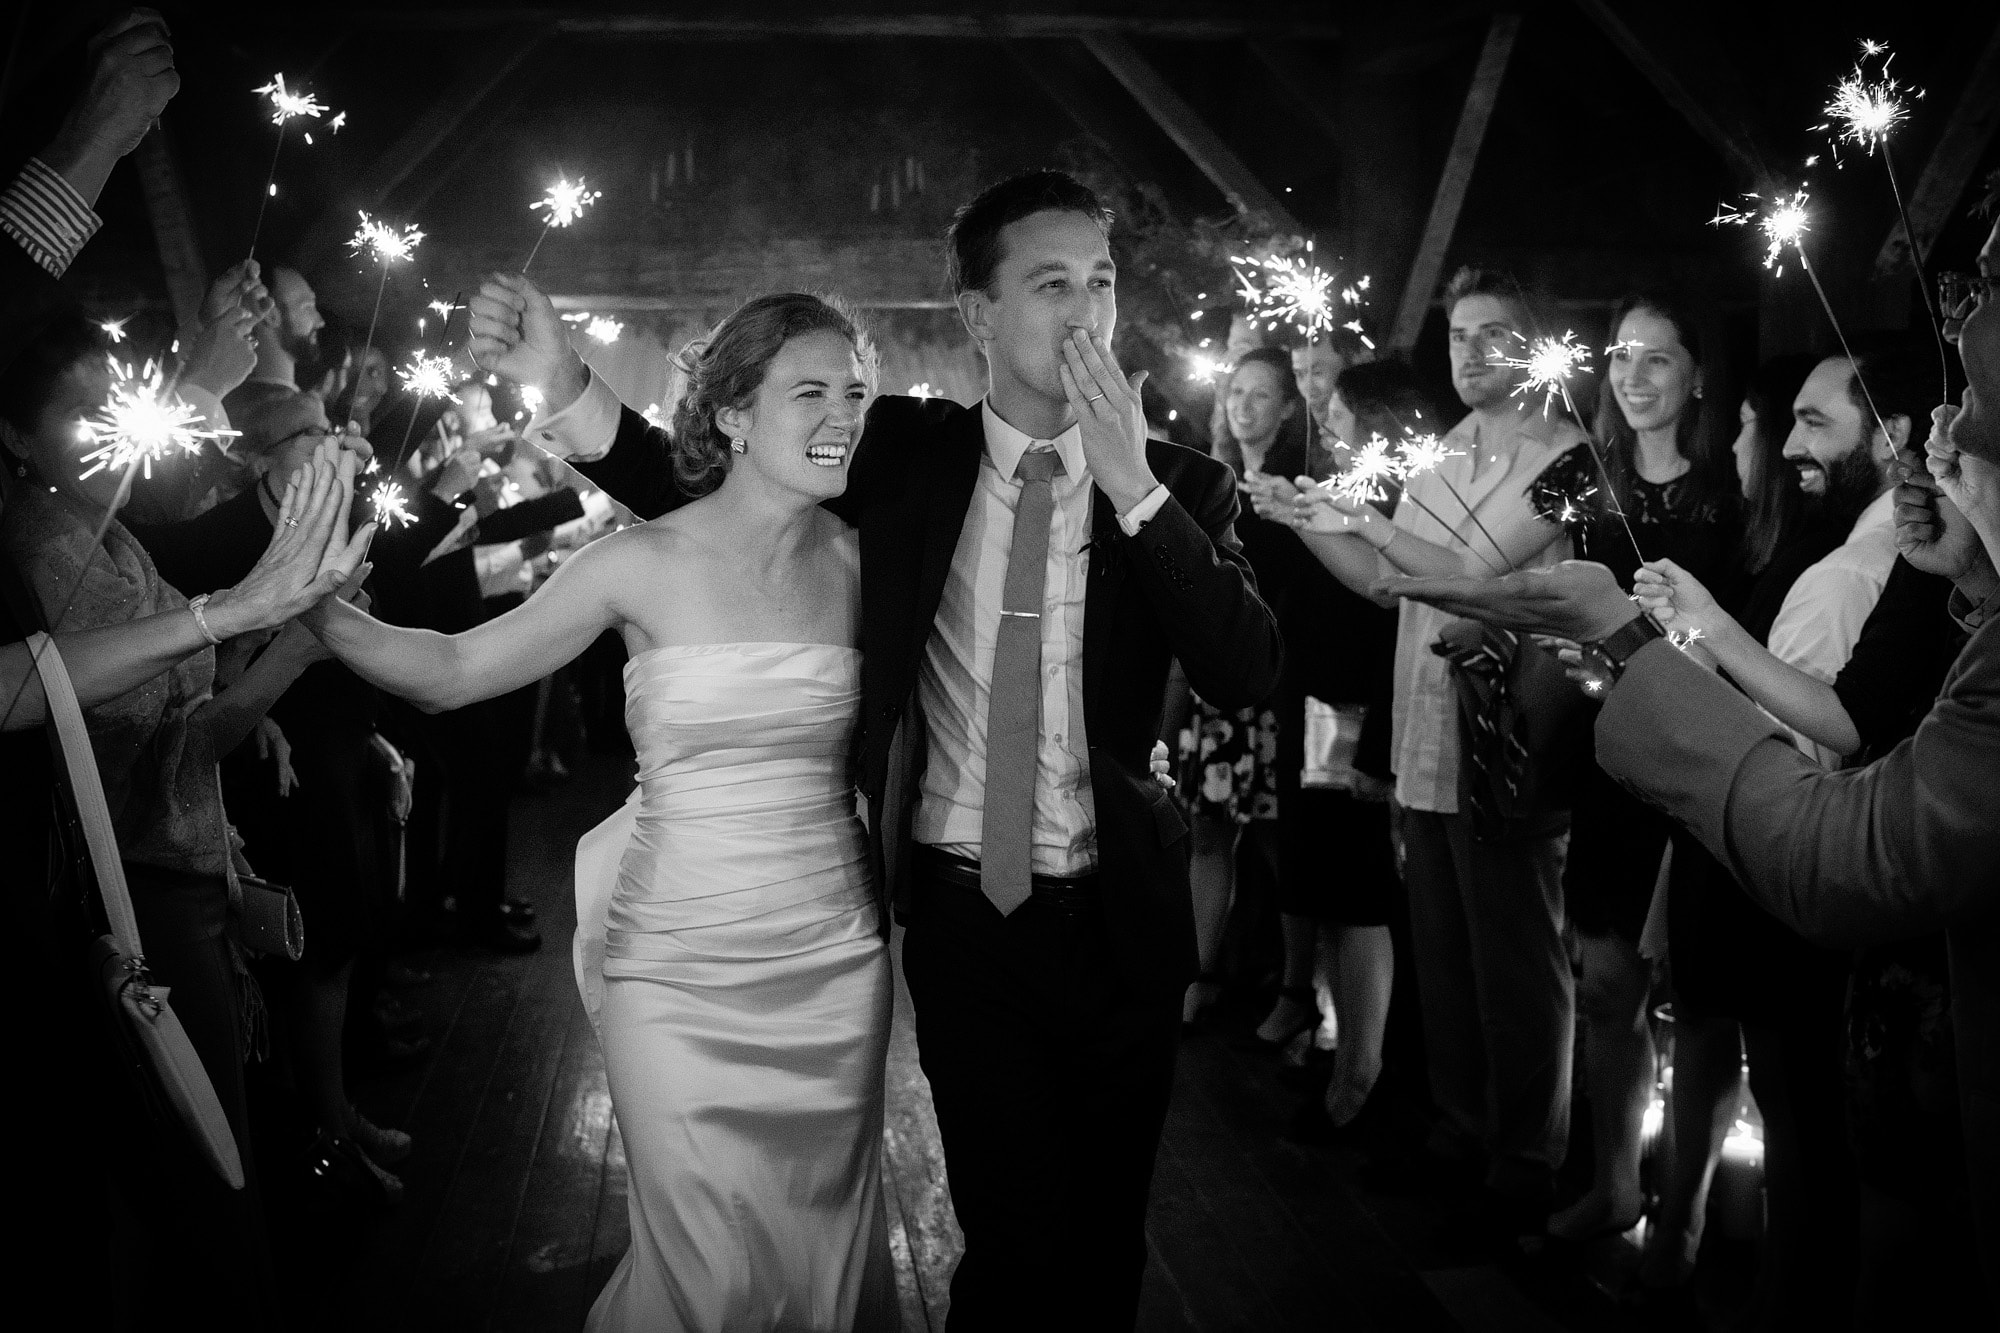
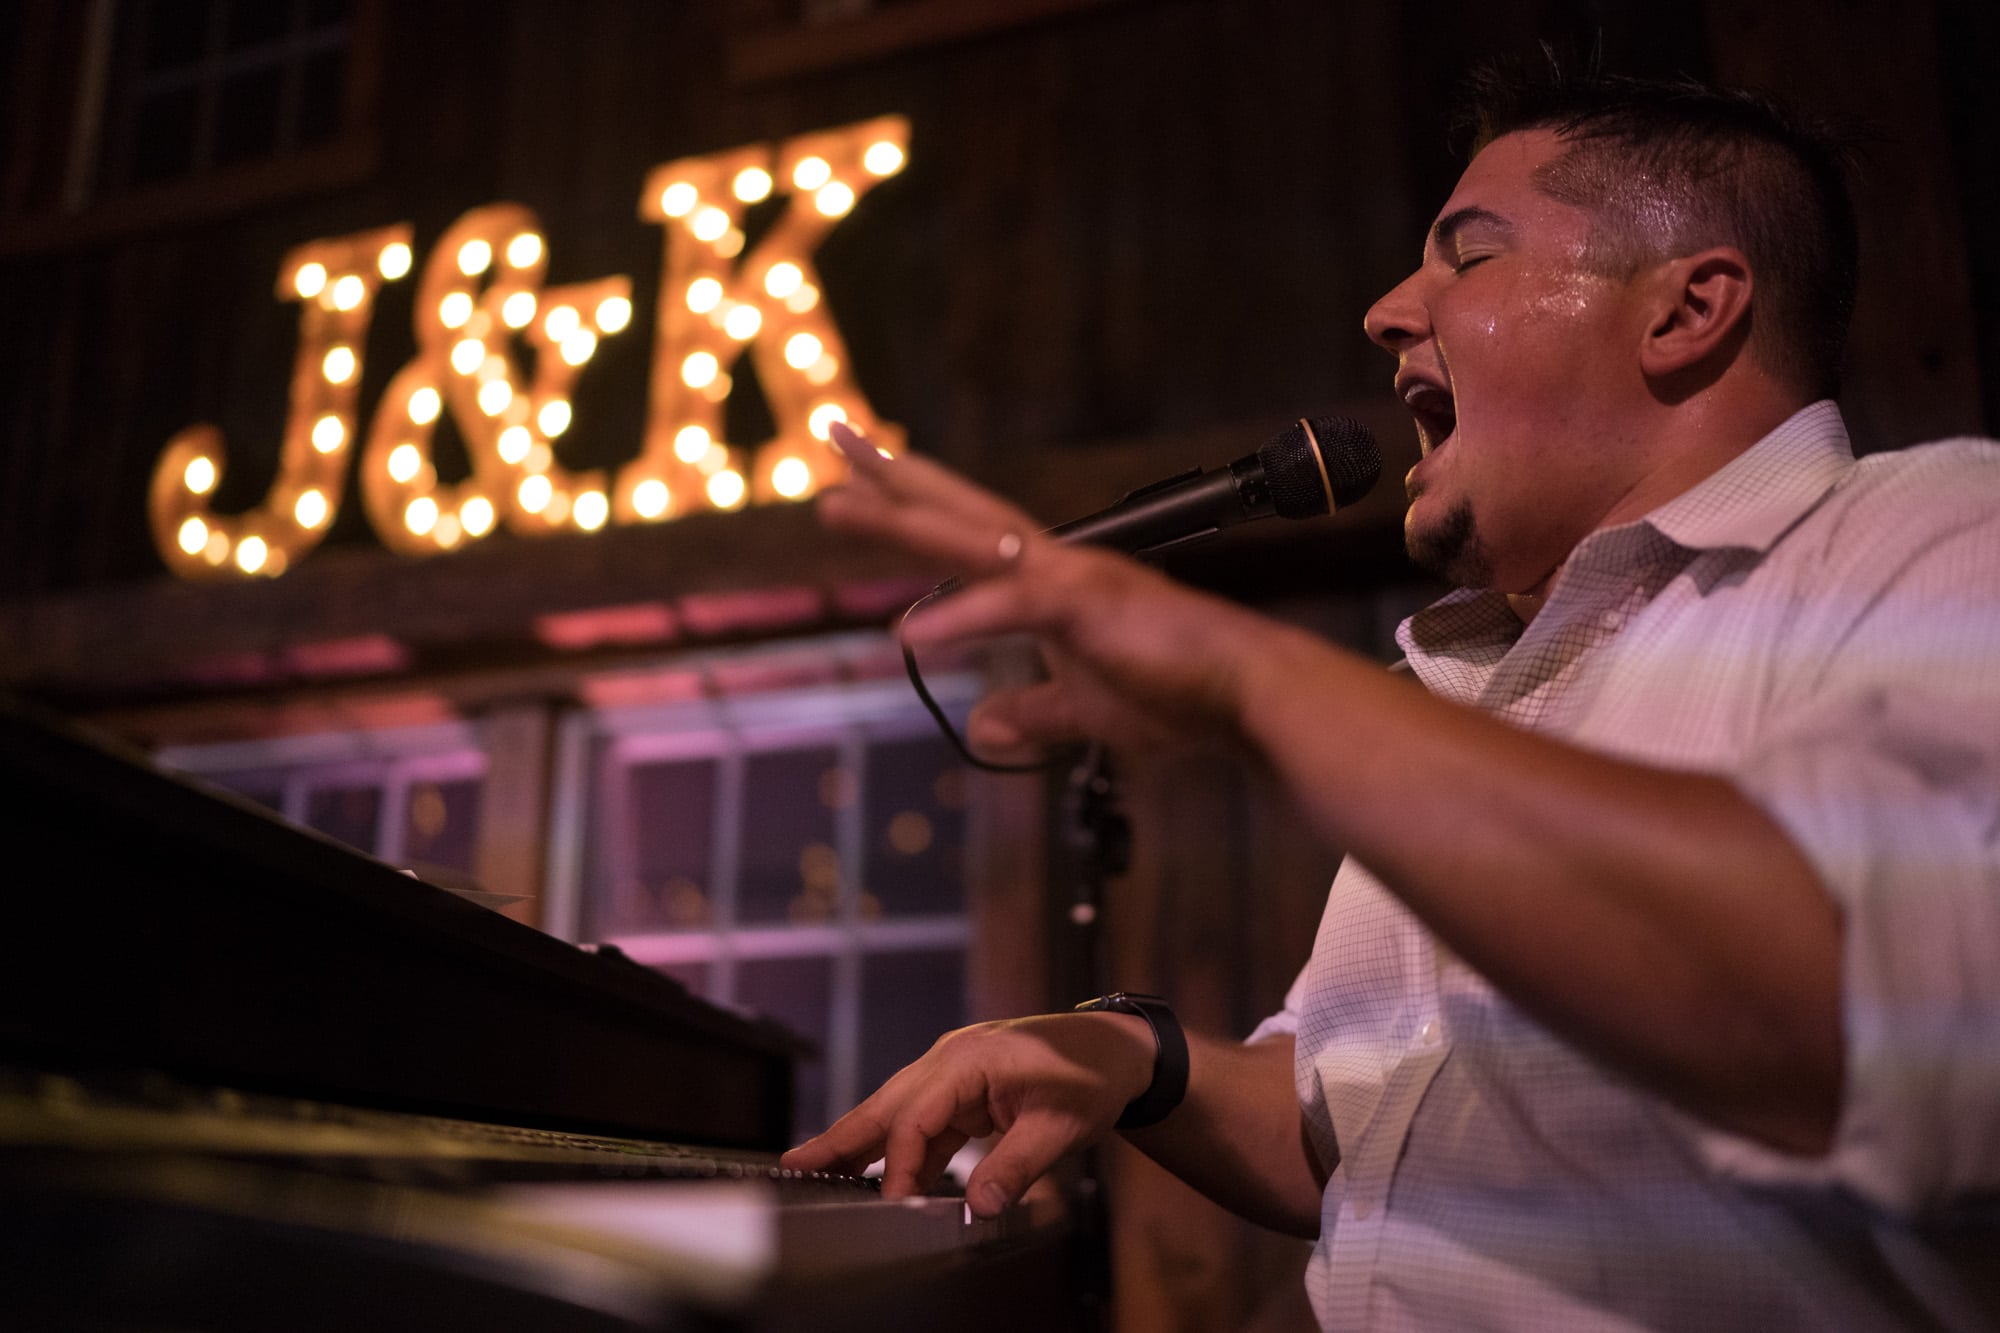
The Sony A9 is perfect for on the fly changes to exposure, without missing a beat; the EVF enabled me to dial in the perfect exposure to capture this couple’s sparkler exit without taking my eye away from the scene in front of me (for sparkler exits you never quite know what the exact exposure will be until the couple is already in motion).
From Nikon to the Sony A9
I recently switched camera systems, leaving my trusty Nikon D750 for the Sony A9 camera. I have been shooting Nikon for my entire photography career, currently 11 years. I’ve been shooting weddings ten of those years. I’ve previously shot weddings on the Nikon D300, D700, D3, D3S, D4, Df, and finally the Nikon D750. The D750 was as close to a perfect wedding camera I’d found – for me (a not particularly strong or large female with relatively dainty hands). It was comparatively small and light, snappy, and had pretty great low light capabilities. A lot of people complained about the color and contrast – I set up a develop import setting in Lightroom of +10 contrast and +10 vibrance, and was very happy with the files.
So why switch to Sony? Well, several years ago I started exploring mirrorless cameras to use as my personal camera for vacations and for smaller non-wedding shoots (engagement sessions, outdoor family sessions). I played briefly with the Fuji X100 and X-Pro 1, then the Olympus, and settled on the Sony. There are a few things that I truly love about mirrorless cameras, and which I think make them the future of wedding cameras: their ability to shoot silently; the EVF (electronic viewfinder) which enables you to see your exposure and white balance as you shoot; and the small form factor, which is a big deal when you’re carrying two bodies and large prime lenses for a ten hour day each weekend.
The clean, vibrant Sony colors are the perfect fit for my work. I don’t need to add back color during processing as I did for my Nikon D750.
I found the Sony color to be a great fit for my work, which is clean and vibrant – no VSCO filters here – and I loved that they had full frame sensors in tiny bodies. The sharpness was also superb. I have owned and enjoyed the A7, A7ii, and the RX1Rii. The latter has some issues, but it’s still by far my favorite walkabout travel camera I’ve owned. It has a fixed 35mm f2.0 lens, superb image quality, and it’s tiny. I’ve used it as a third body at weddings with some success, but the focus was never quite fast enough for my documentary/photojournalistic style of photography. The A7 series was great for slower paced portrait sessions, but couldn’t keep up with weddings or documentary family sessions.
I wasn’t particularly excited about the A9 when it was announced; I knew it was an improvement on the A7 series with dual cards and improved battery life, but it was also bigger and heavier, not that much smaller than my Nikon D750. It was also priced for professionals – a hard pill to swallow when you’ve become accustomed to shooting on “prosumer” level gear (I matched my Nikon D750 bodies with the prosumer f1.8 35mm and 85mm primes). I hadn’t spent that kind of money on a camera body since ditching the huge powerhouse that was the Nikon D4 (a superb camera but way too much for how I shoot).
But, I couldn’t resist “borrowing” one from my favorite online camera retailer and putting it through its paces.
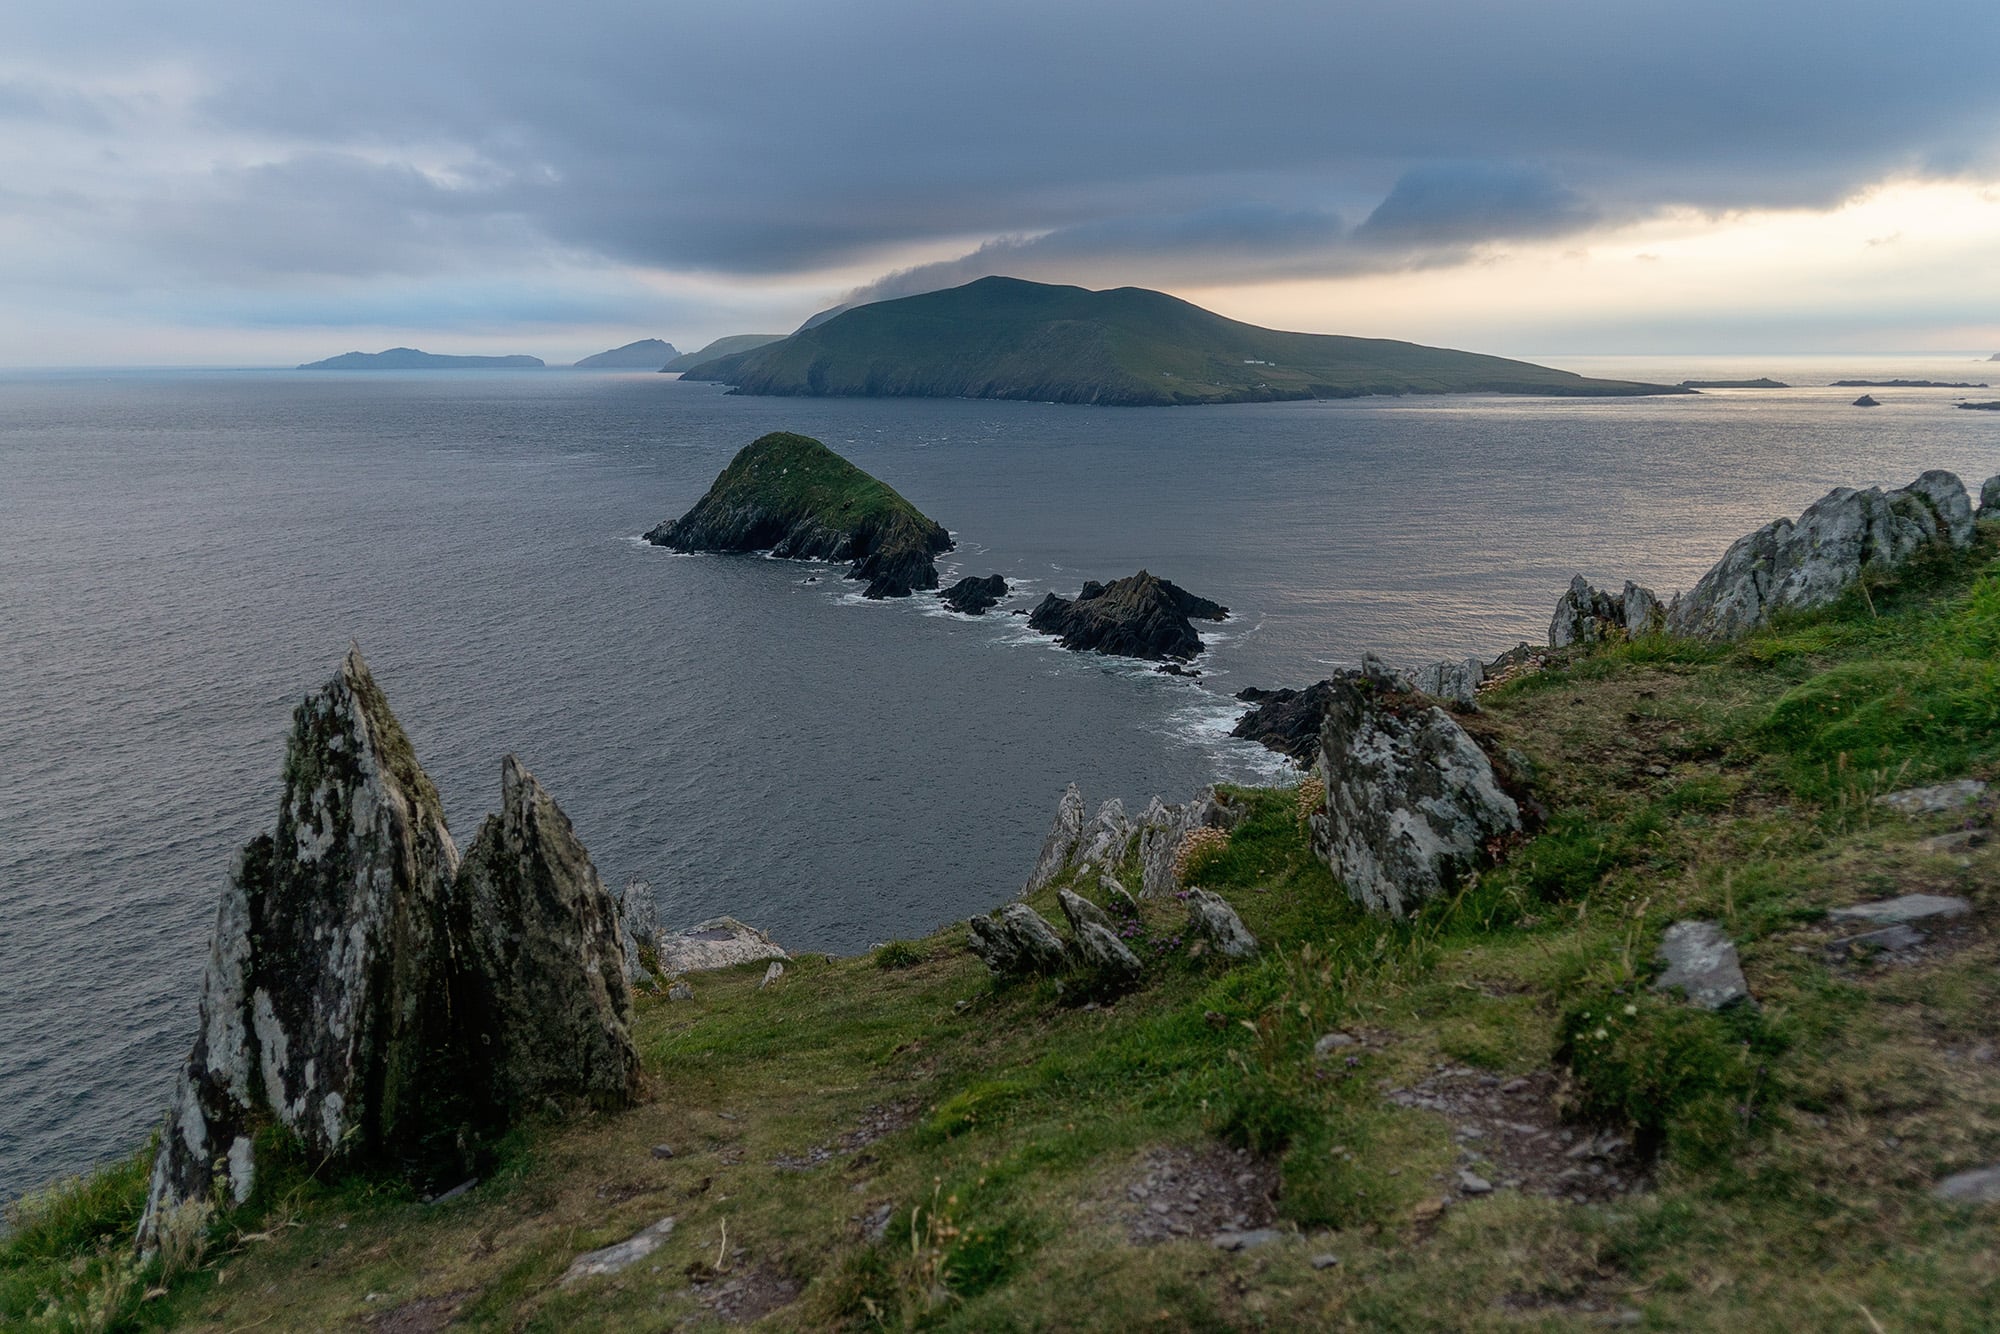
My first paid gig with the Sony A9 took me to Ireland, where I was photographing stills to be used in conjunction with a video commercial.
First Impressions of the Sony A9
My first shoot with the A9 was a commercial travel shoot for Collette which took me to Ireland. I’d played with the camera just enough to know that it would be plenty good enough for the shoot, which was mostly outdoors and slow paced; I was taking stills to be used in conjunction with a video ad made by the amazing guys at Gnarly Bay. I also brought along backup Sony gear that I was accustomed to using.
By the end of the two day shoot I was falling hard for this camera. It surpassed my every expectation in terms of performance, and the files were gorgeous. Not just gorgeous, but barely in need of editing. The SOOC (straight out of camera) JPEGS were superb. For daytime shoots, I rarely process the RAW files, because the JPEGS need so little help, and the A9 does a beautiful job with the contrast and color in the JPEGs. The RAW files need a little boost to get them looking as nice – so why bother with the extra step if you don’t need the RAW image latitude? I admit, it is taking some getting used to, processing just JPEG files, but it makes for a speedier workflow, and I’m hoping that eventually I will have the confidence to shoot JPEG only for weddings and other evening events.
Straight out of camera (SOOC) JPEG file. The color is gorgeous, it just needs a touch of warmth and brightness adding in post.
The finished file. I barely touched it in Lightroom, then processed it using my signature Photoshop action which adds a little contrast, mid tone brightness, and sharpening.
My first paid gig with the Sony A9 was in early July. Two months later, I’ve second shot one wedding for a friend, and photographed five more of my own with just the A9 setup (I acquired a second Sony A9 body shortly after the commercial gig). I’ve also had a number of family and engagement shoots since making the switch – all of which were processed using just the JPEG files. For weddings, I’m still working mostly with the RAW files at this point.
So, what’s to love?
Silent shutter: this is huge for me. Most of the wedding day, I want to be as unobtrusive as possible. I get down low, I wear ninja-black, and I don’t direct outside of the formals. Adding a silent shutter means I can be quite literally on top of my clients without them being aware of my presence.
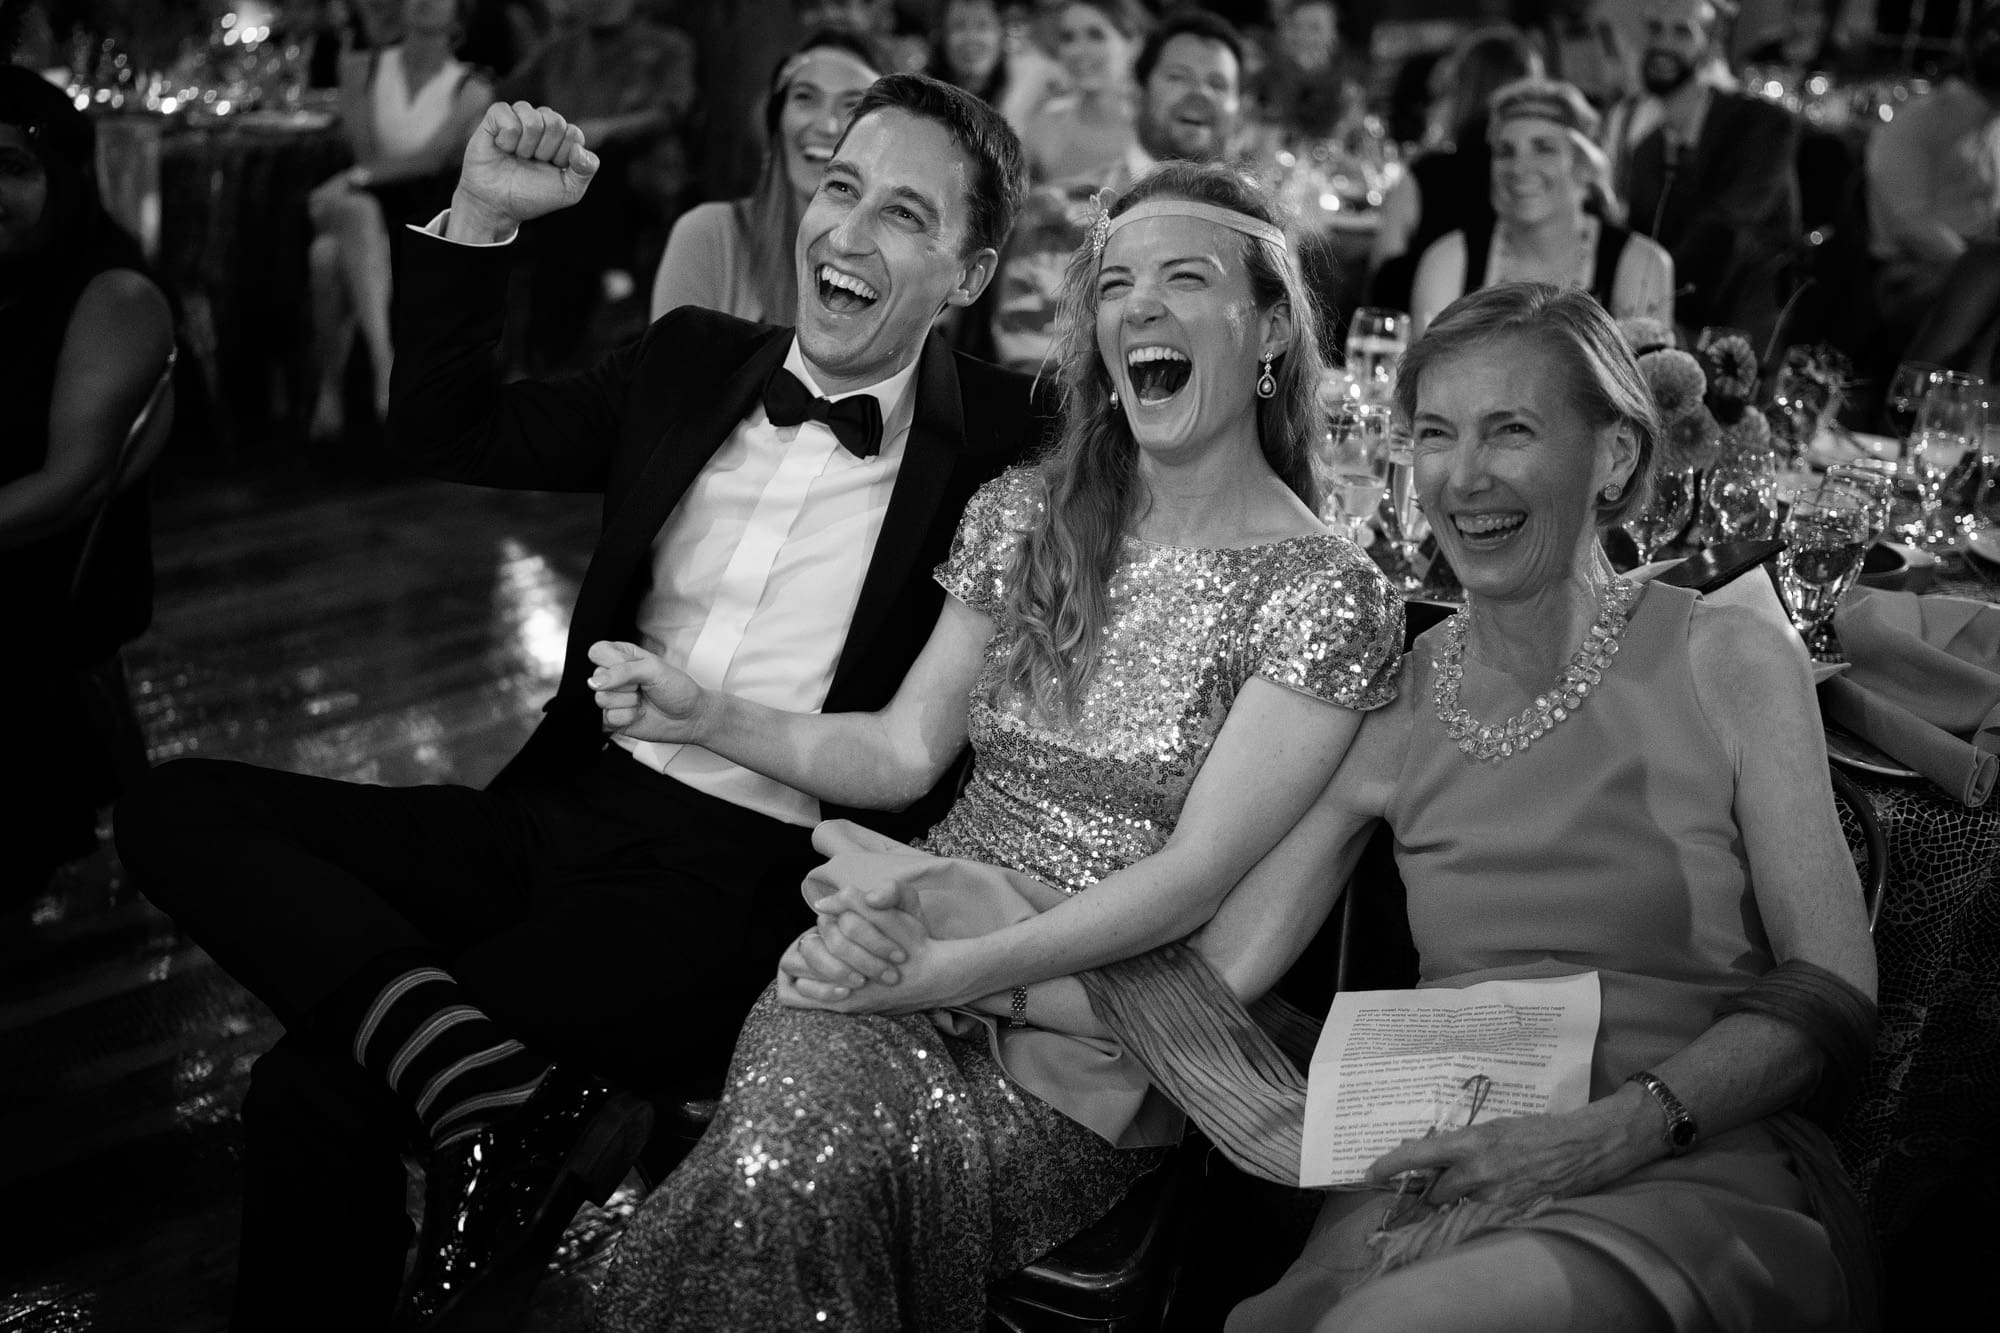
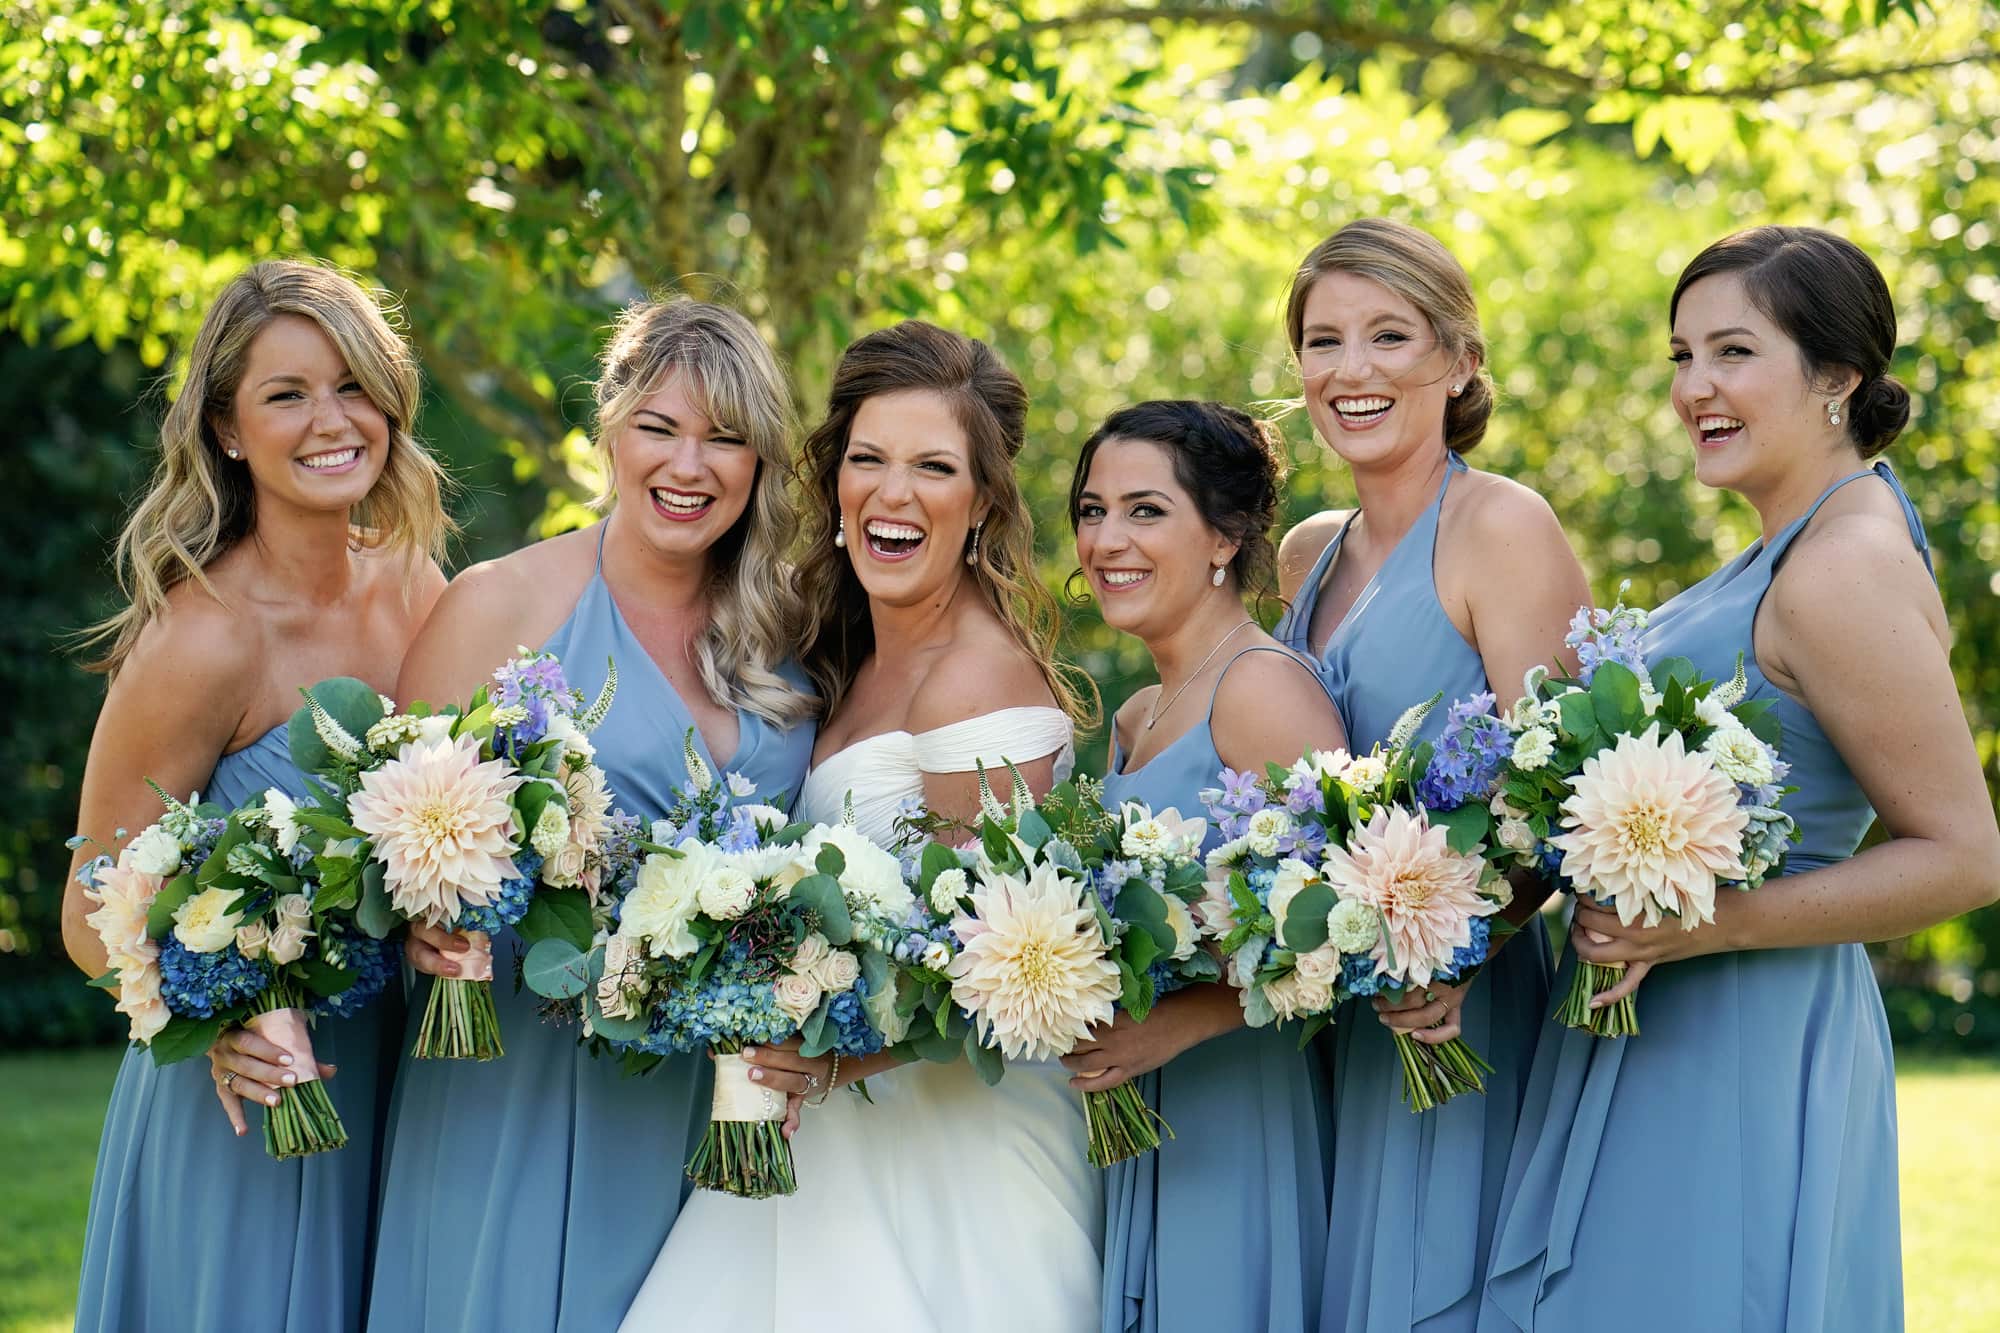
Shooting wide with the Sony 35mm 1.4 (my favorite lens in this system), I was almost touching the bride’s mom, and yet she, and the couple, seemed completely unaware of my presence, as I was shooting silently.
During the ceremony this is gold. Most officiants will allow you to get closer – or rather, they won’t notice you sneaking in closer – if you’re not making any sound while you’re doing it. I’ve had guests thank me after the ceremony for being so quiet and unobtrusive! Just last week, an older woman said she’d hire me in a heartbeat just because she barely noticed my presence throughout the day. I think that as mirrorless cameras become more common, having a noisy DSLR is going to be seen as a negative check against the photographer. We’re not there yet, but maybe in five, ten years …
In addition, at many of my weddings I work with talented, high-end videographers; I know that they appreciate not having their films filled with shutter clicks. I used to try to hold back a little during key moments for audio (for example a bride reading aloud a letter from her future husband) but this doesn’t mesh well with my documentary approach. Now I can shoot as many frames as I like without worrying whether it’s ruining the audio.
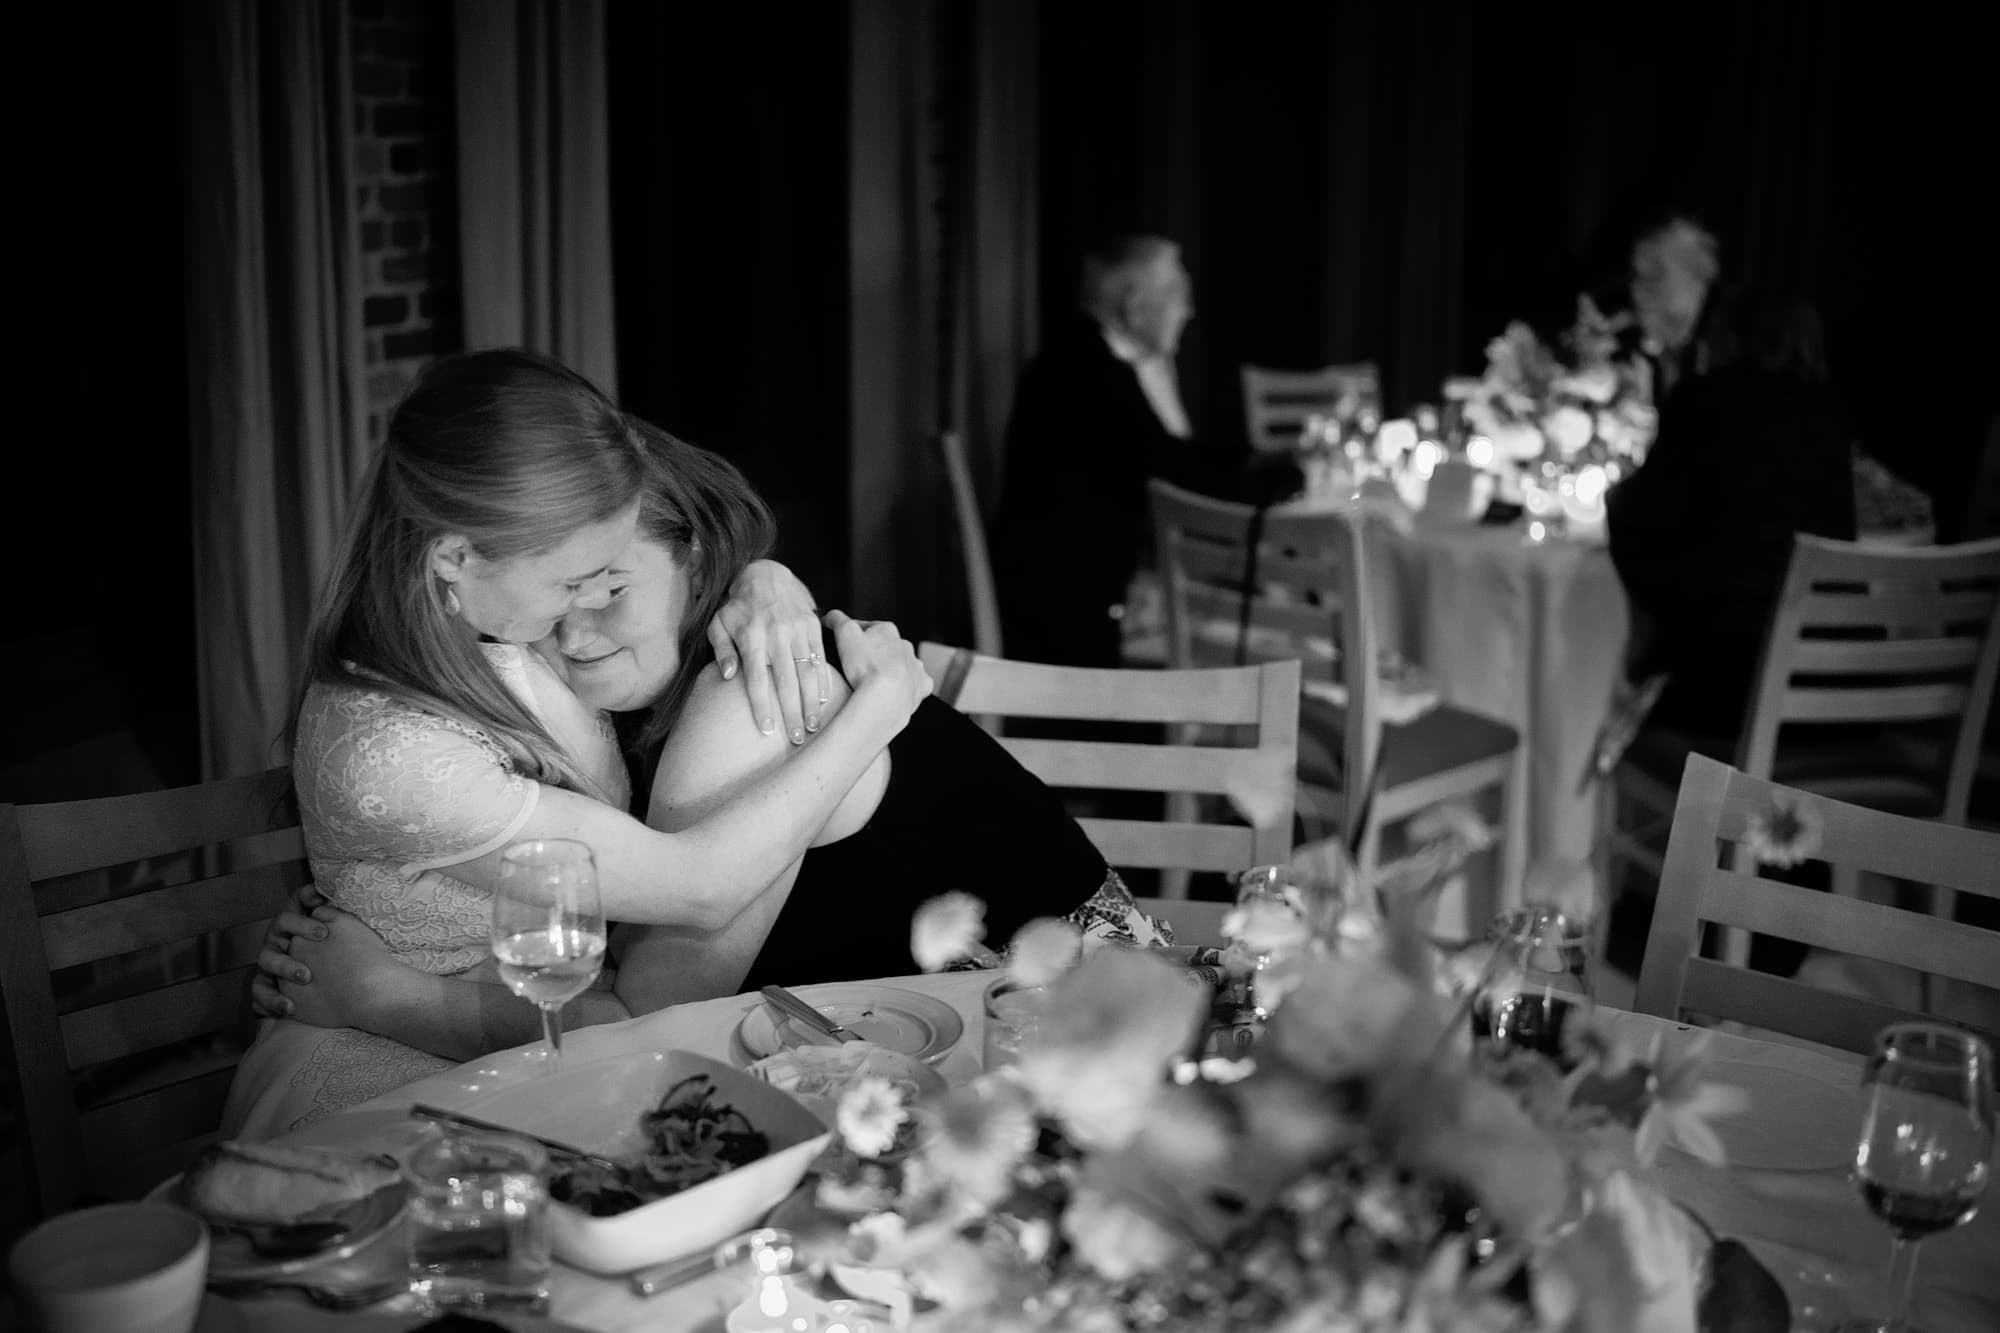
This was a sweet moment at the rehearsal dinner at my Labor Day wedding. By shooting silently, I knew I wouldn’t disturb this sweet, emotional moment between the bride and her sister at the end of dinner.
The one potential negative, is that the silent shutter can be a bit weird for people when you’re taking their portrait. I’ve found I have to explain that yes, I am taking photos, they just can’t hear it. You can of course switch to mechanical (non-silent) shutter easily – I have a custom button set up for that – but I don’t enjoy the camera’s performance nearly as much when it’s in mechanical mode. Everything feels less snappy. So, I very quickly explain that my camera is silent, add a line about how it’s awesome for the ceremony, to which they smile and I get a nice reaction shot. Always a silver lining. 🙂
EVF (Electronic Viewfinder): I LOVE the A9’s EVF. The image is crisp, sharp, beautiful. When shooting outdoors, it is much easier to see than the image on the back of the camera. I’ve always been a pretty accurate shooter, rarely needing to adjust my exposure more than 1/3-2/3 of a stop in most conditions, but I’m now nailing exposure 95% of the time. Completely nailing it. Not just that, but I have immediate feedback on white balance, and though I rarely dial in kelvin (I find auto does a pretty great job) I immediately know if I need to. If I switch to JPEG-only for weddings, this will be invaluable.
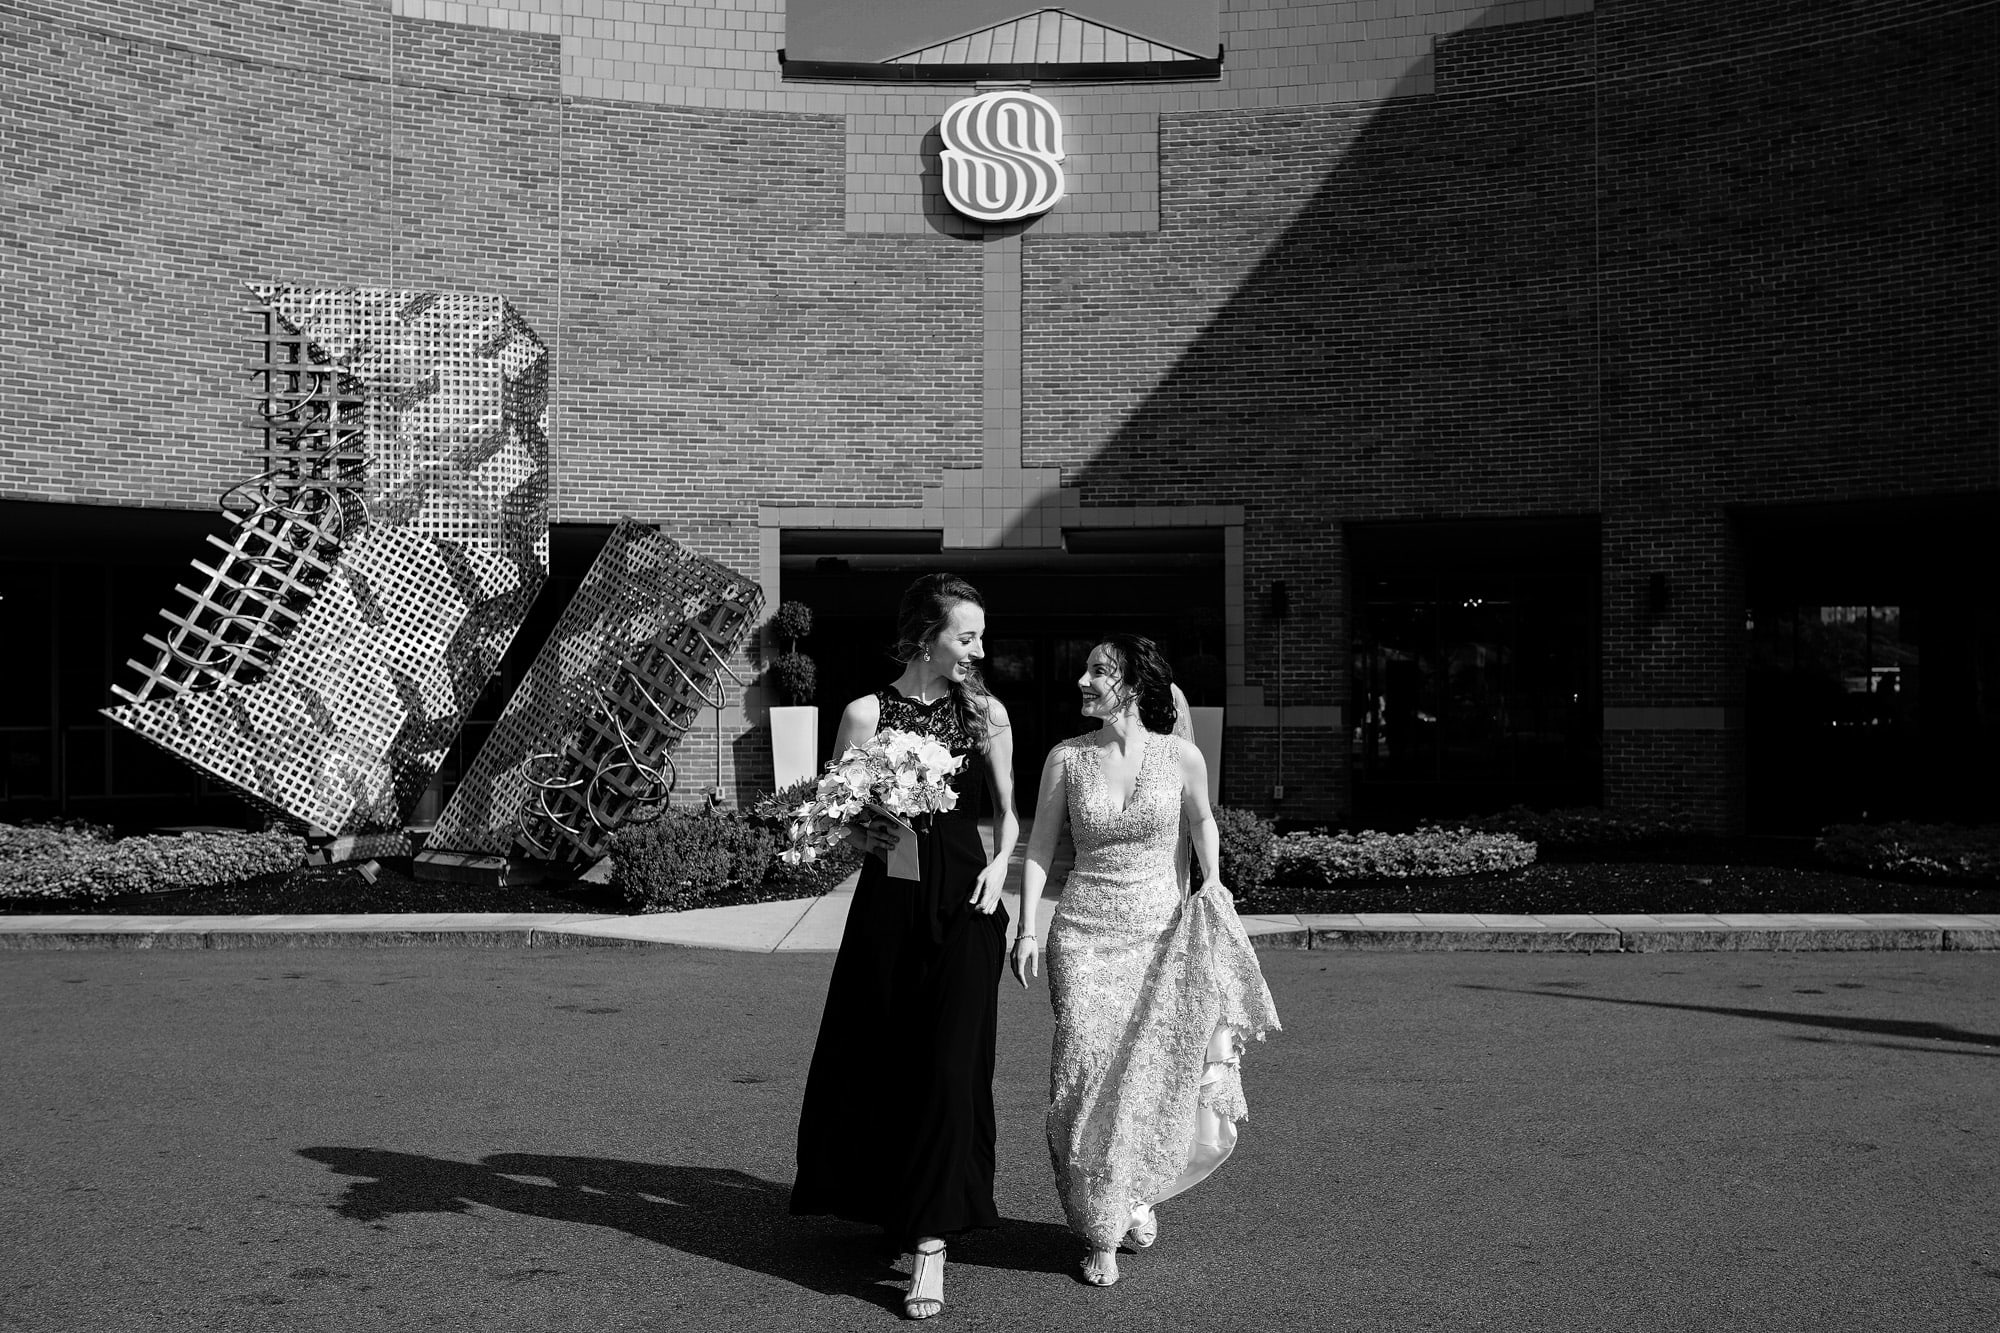
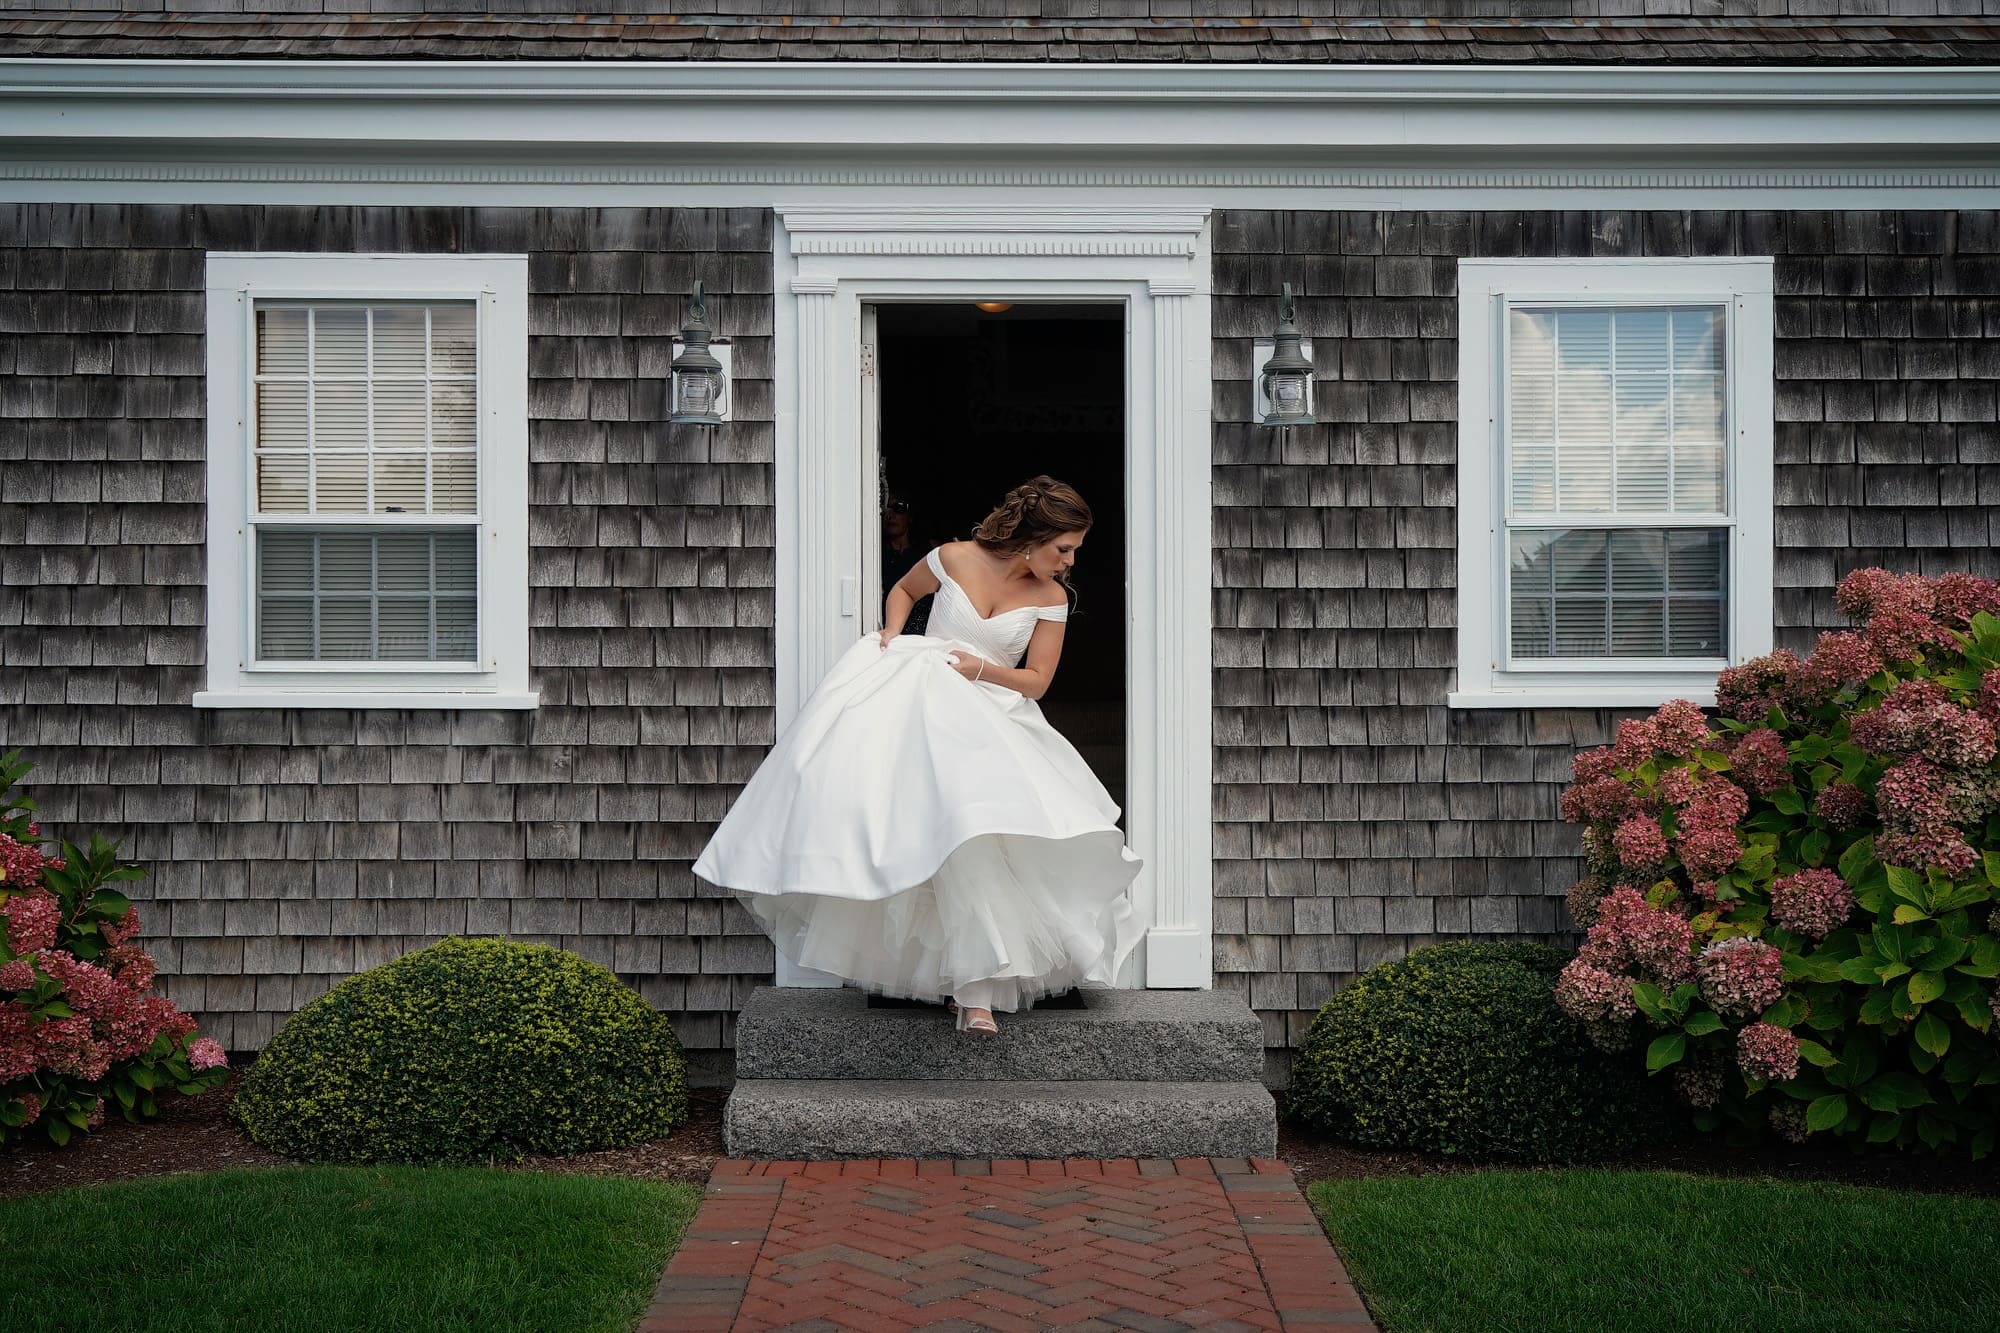
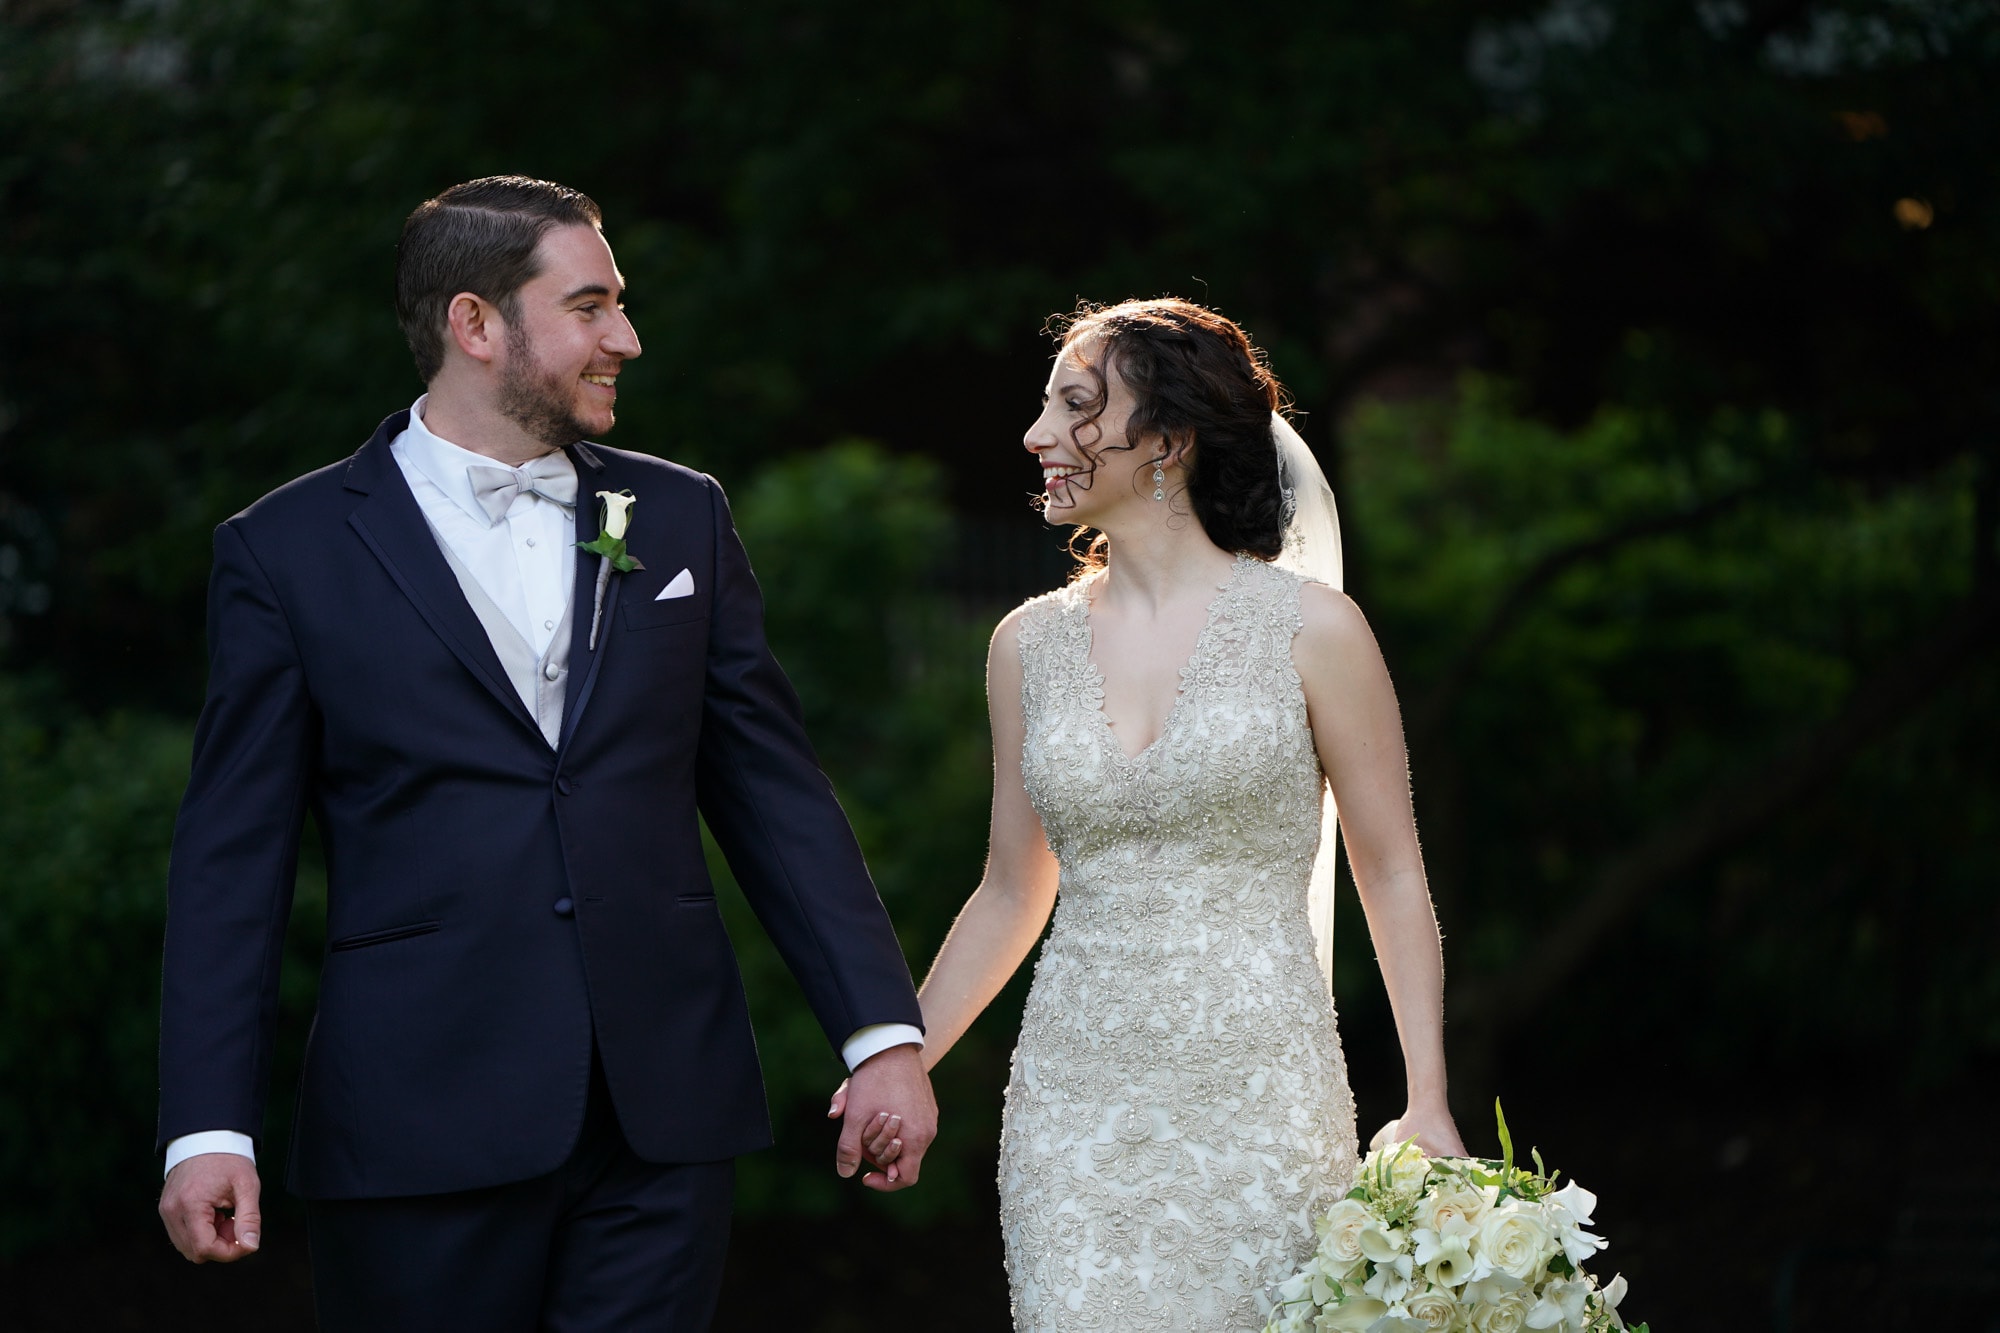
Hard light situations with deep shadows can be tricky for auto exposure. Especially when you’ve just walked outside from a dimly lit interior. Using the EVF and aperture priority mode, I was able to nail the exposure without taking my eye away from the EVF, all while walking backwards at a fast clip as we were running late for the first look. Had I been shooting my D750, I might have attempted this shot, but I likely wouldn’t have nailed it.
A colleague recently told me that shooting with an EVF makes him feel disconnected, like he’s watching a video of the room he’s in; I’m guessing he hasn’t used the A9 EVF, as I feel more present with the immediate feedback not just on the scene, but on my settings that are capturing the scene. I feel it has already made me a stronger shooter; and with less (almost zero) chimping, I’m missing a lot less of what’s going on around me – again making me more present.
Using an EVF does take a little getting used to, but when it’s that sharp, and bright, and accurate, it really does aid the creative process by taking away a layer of technical worry.
Custom Buttons: Sony has always done custom pretty well. The downside being that the menu system is so enormous that many have griped about it over the years. The A9 menu system is much improved, especially with the addition of the My Menu (a custom menu to which you can add all of your favorite options, saving much time hunting for settings).
The Sony A9 has several easily reached custom buttons that you can set up to almost anything you want. There are tons of YouTube tutorials on how to do this, and I’m not going to go into technicalities here, but here are some of my favorite custom settings I’ve dialed in:
– AF-ON: back button focus. I have shot back-button focus for the past 7 or 8 years; I never dreamed of using anything but, but the A9 makes it silly not to use the amazing face recognition and Eye-AF. I like having back button focus for those occasional times when I need to focus on a hug with no faces visible, or a foreground object with people in the background. I don’t use it much but it’s super accessible for those critical times when I need it immediately.
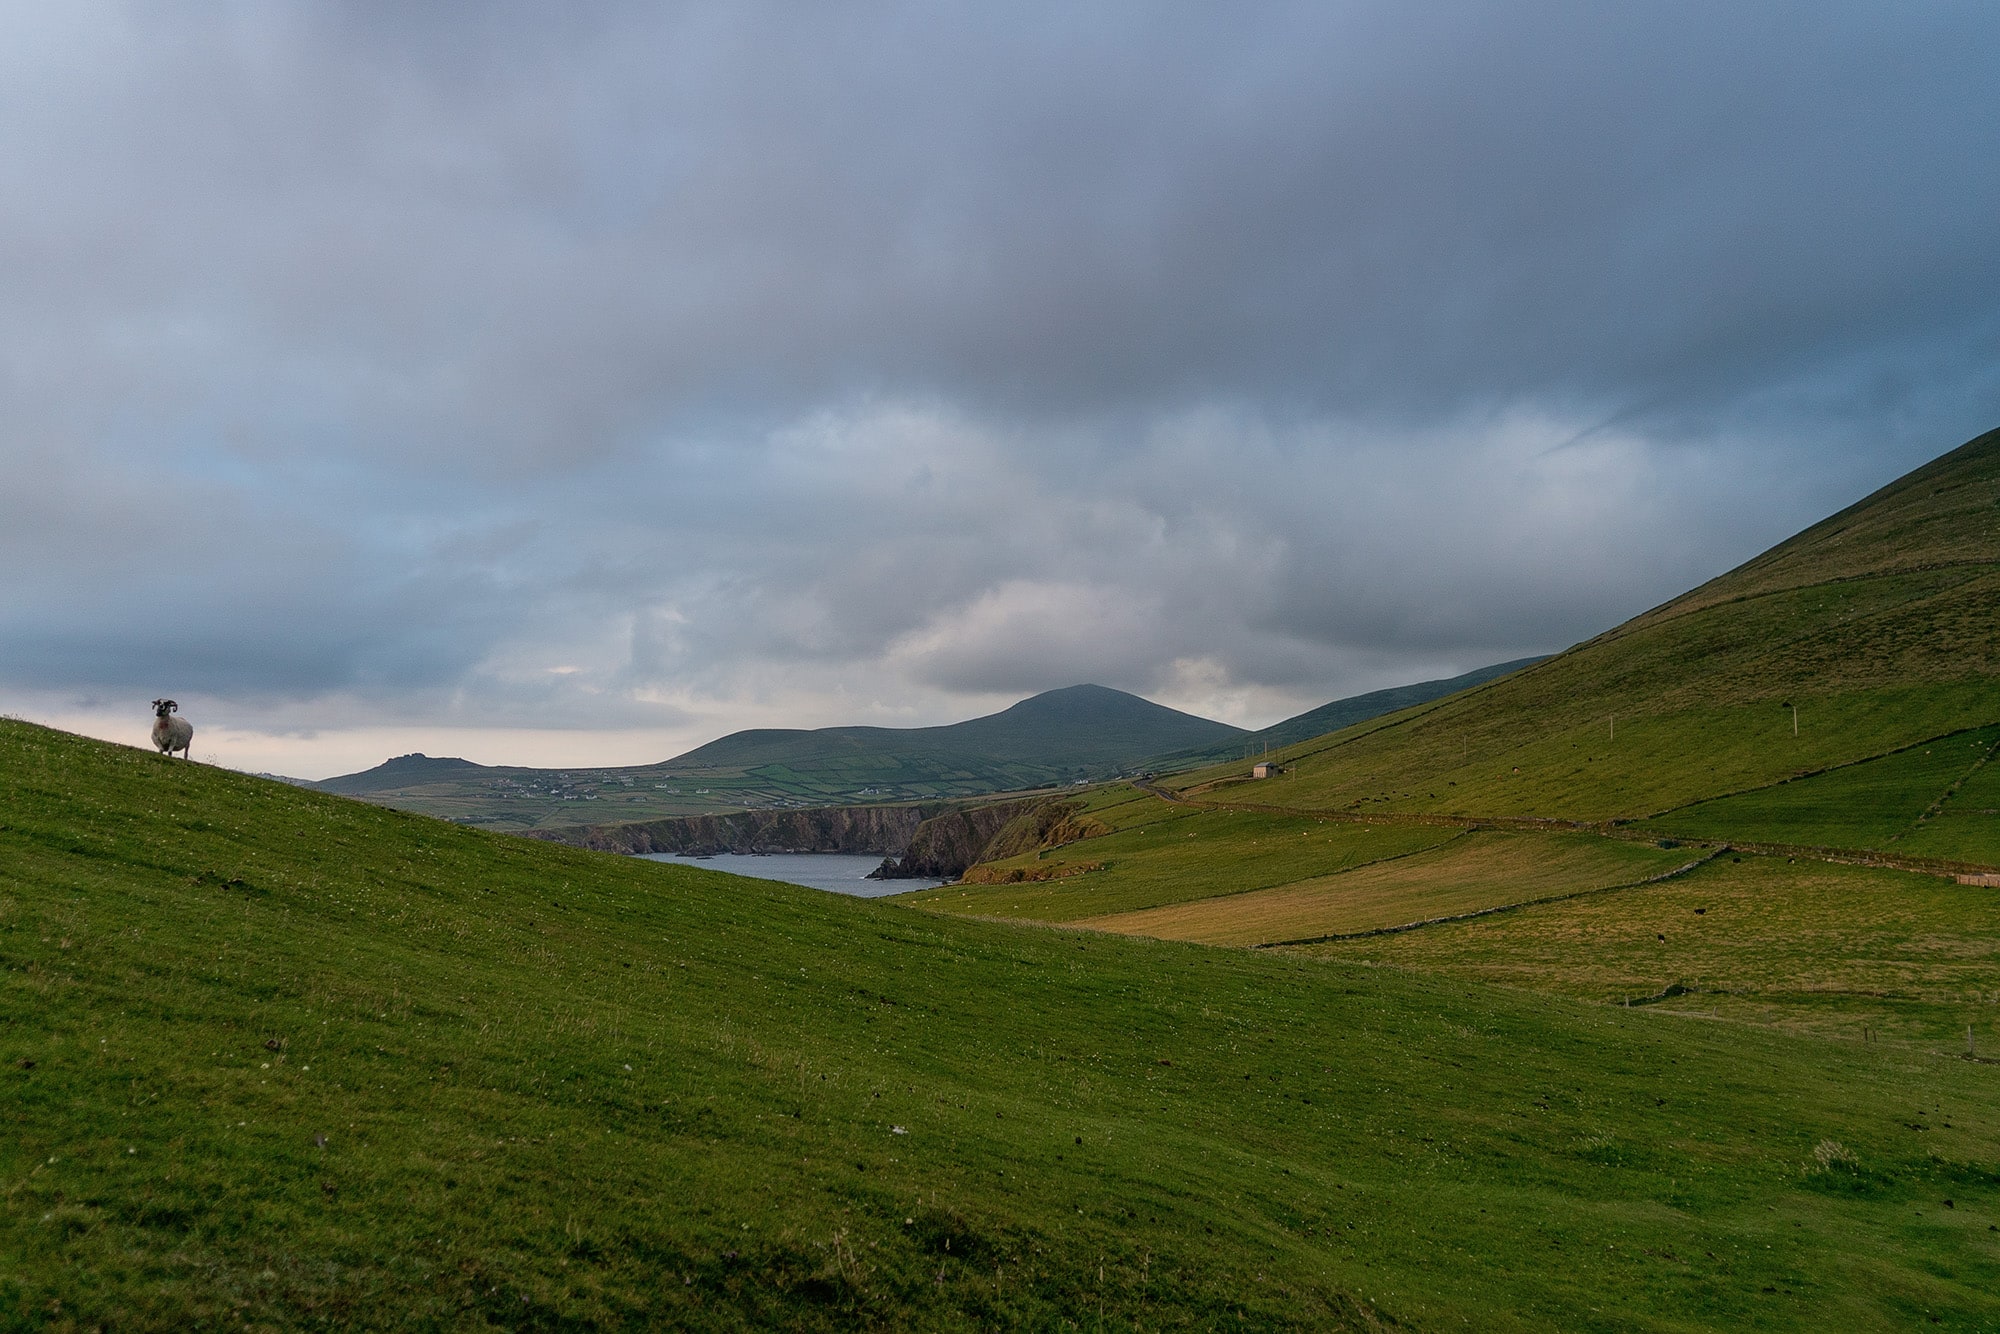
Back button focus is pretty handy for photographing sheep on a hillside in beautiful Ireland.
– AEL: Eye-AF. I have Face Detection set to on, so the A9 automatically focuses on the most central face in whichever focus area is selected (usually wide, but I switch to zone for the processional/recessional and a few other times during the day). I sometimes use Eye-AF to grab sharp focus on the eye of that face, especially when I’m shooting at 1.4 or 1.8 (which I’m now doing much more frequently, because the focus is tack sharp).

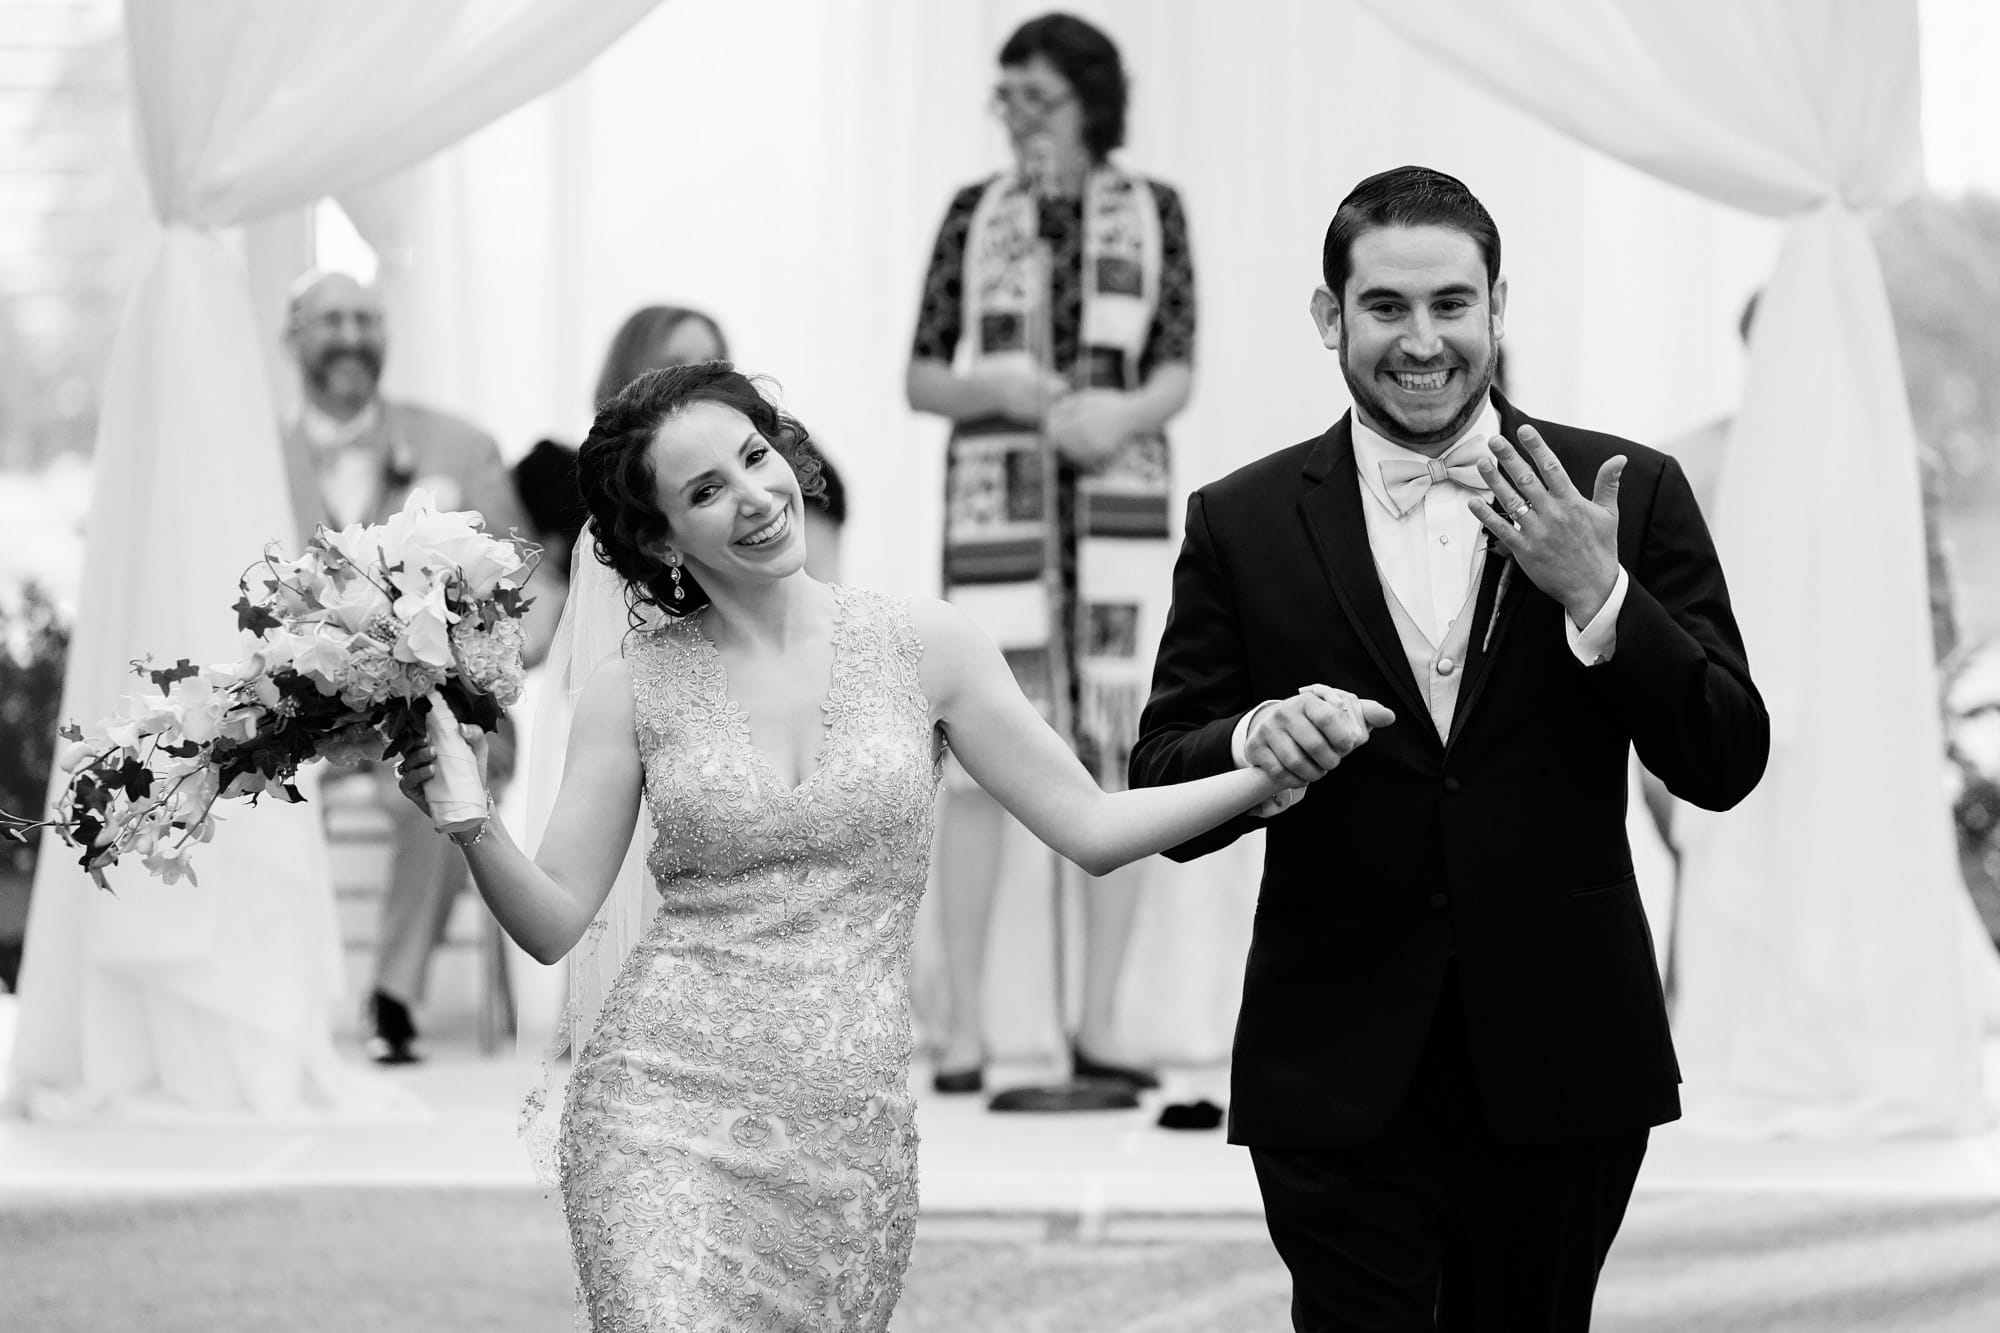
Eye-AF tracking enabled me to get a bunch of great shots of the bride and groom as they entered their reception. They were moving pretty fast, and the Sony A9 kept up, no problem.
– C4: APS-C mode. I shoot prime lenses, no zooms. The longest available native prime lens right now is a 135mm 2.8. It’s usually plenty of reach – I’m not afraid to get in close – but in a huge church it’s nice to have the option to “zoom in” x1.5 for a few tight shots during key moments. The downside to this is that the file size is reduced by around half, but I’d rather do this and compose well in camera, vs cropping in tight later. I’m not worried about the reduced file size for these photos, as no one is going to blow up a ceremony closeup to life size. Again, I rarely use this, but it’s handy in big church weddings.
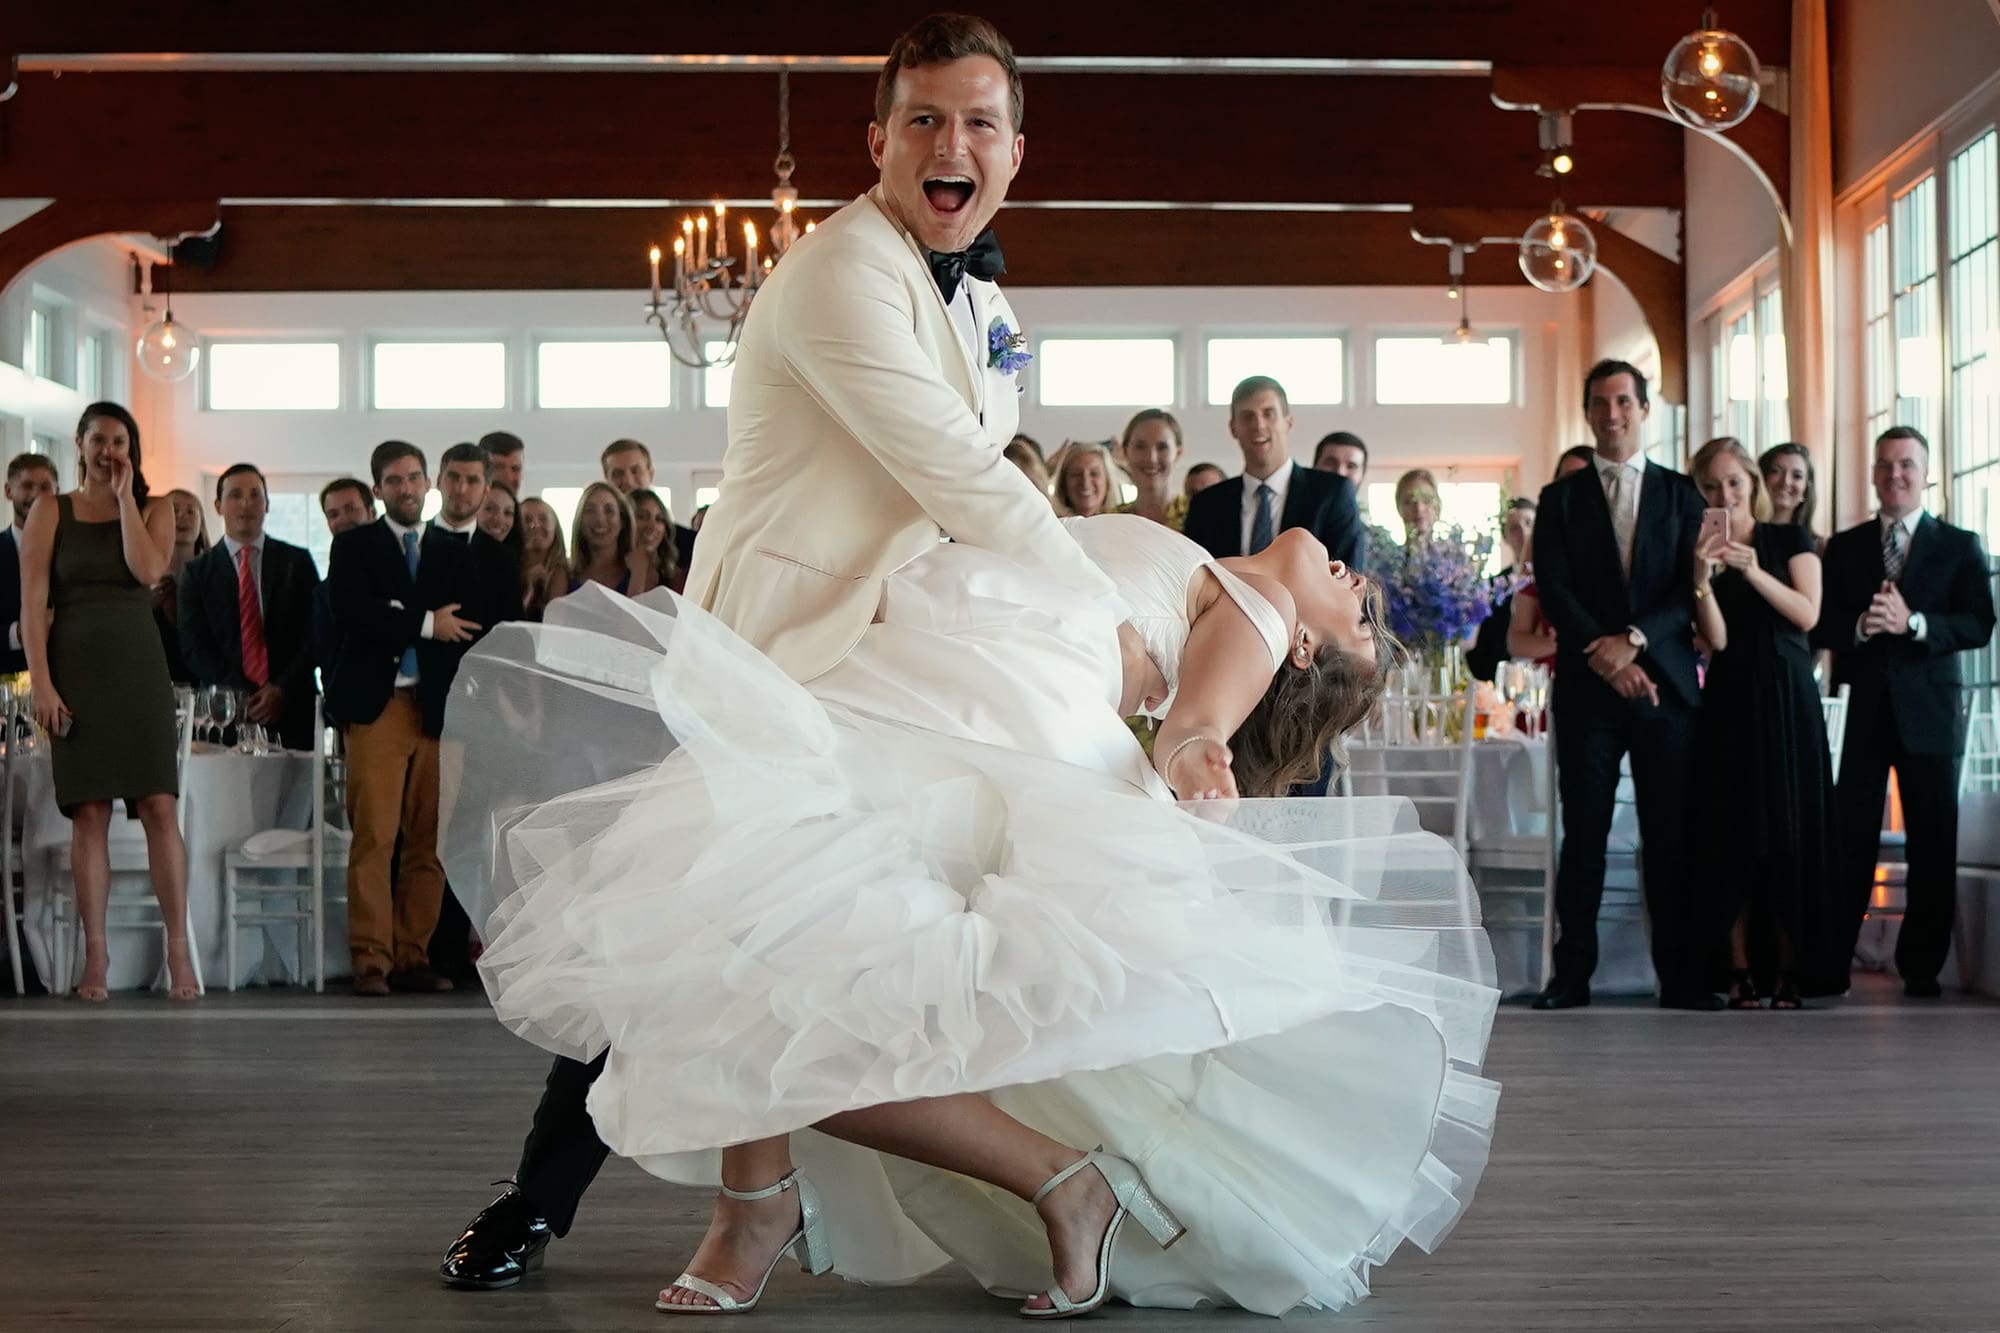
APS-C mode is also useful for when you’ve chosen the wrong lens, your camera bag is on the other side of the room, and the first dance is on steroids. Cropping in from the 35mm view gives perfect composition to this fantastic moment.
– C1 and Center Button: “oh shit” mode. Thanks to my UK A9 colleagues for the term; the “oh shit” mode is for when you have to capture the moment but your settings are all wrong (e.g. you just left a dark building and haven’t set your exposure for the bright light outside yet). My “oh shit” settings are a custom recall hold that dial in Aperture Priority mode, Aperture 2.8, Exposure Compensation 0.0, ISO Auto, Focus Area Wide, and AF On. I use it maybe once per wedding – and always get a usable shot that I would have missed without this button. I have it set in two places because why not?
– C2: EVF/Monitor switch. The EVF automatically senses when your eye goes close to it, but I’ve been in conditions where it’s gotten dirty while I’ve been shooting. Because you can’t always stop shooting to clean the sensor (which you can do quite easily by sliding off the rubber eye cup) it’s helpful having a button dedicated to switching between EVF and monitor view.
– C3: Shutter type. I switch to mechanical shutter when I use flash – usually just for the dance floor photos at the end of the wedding, occasionally for formals if we’re taking them inside somewhere dark.
– Left Button: Focus Area. Focus area is something I change a few times throughout the day, so having a dedicated button is nice – it saves a couple of additional button presses.
– Right Button: ISO. This is the default setting, and it’s super handy. I also have the entire dial set to ISO control because I change it very often. Many A9 users have reported that they accidentally nudge it too often, but I haven’t found it to be an issue. Maybe because I have small hands?
In Body Image Stabilization (IBIS): I’m a pretty safe shooter when it comes to shutter speeds. My poor second shooters are sick of me drilling it in each wedding, “just make sure that your shutter speed is high enough! Double the focal length for your minimum shutter speed!” and so on. So despite knowing that several of my Sony bodies have built in image stabilization, which enables you to use much slower shutter speeds and still get a sharp image, I didn’t really think I’d be making much use of it; I’m not a big risk taker.
Until, that is, I ended up deep in the woods, on a moonless night, at a midnight after-party lit by candlelight and a small bonfire. I didn’t have flash. The videographer brought a couple of lights, but I wanted to see if I could capture the scene and its magical atmosphere without adding light. My ISO ranged from 4000 to 6400. My lens was wide open at f1.8. And I had to shoot at 1/15 to get a decent exposure. On an 85mm. There were some misses, for sure, but the vast majority of the photos were sharp. At a shutter speed I rarely use even on wide lenses.
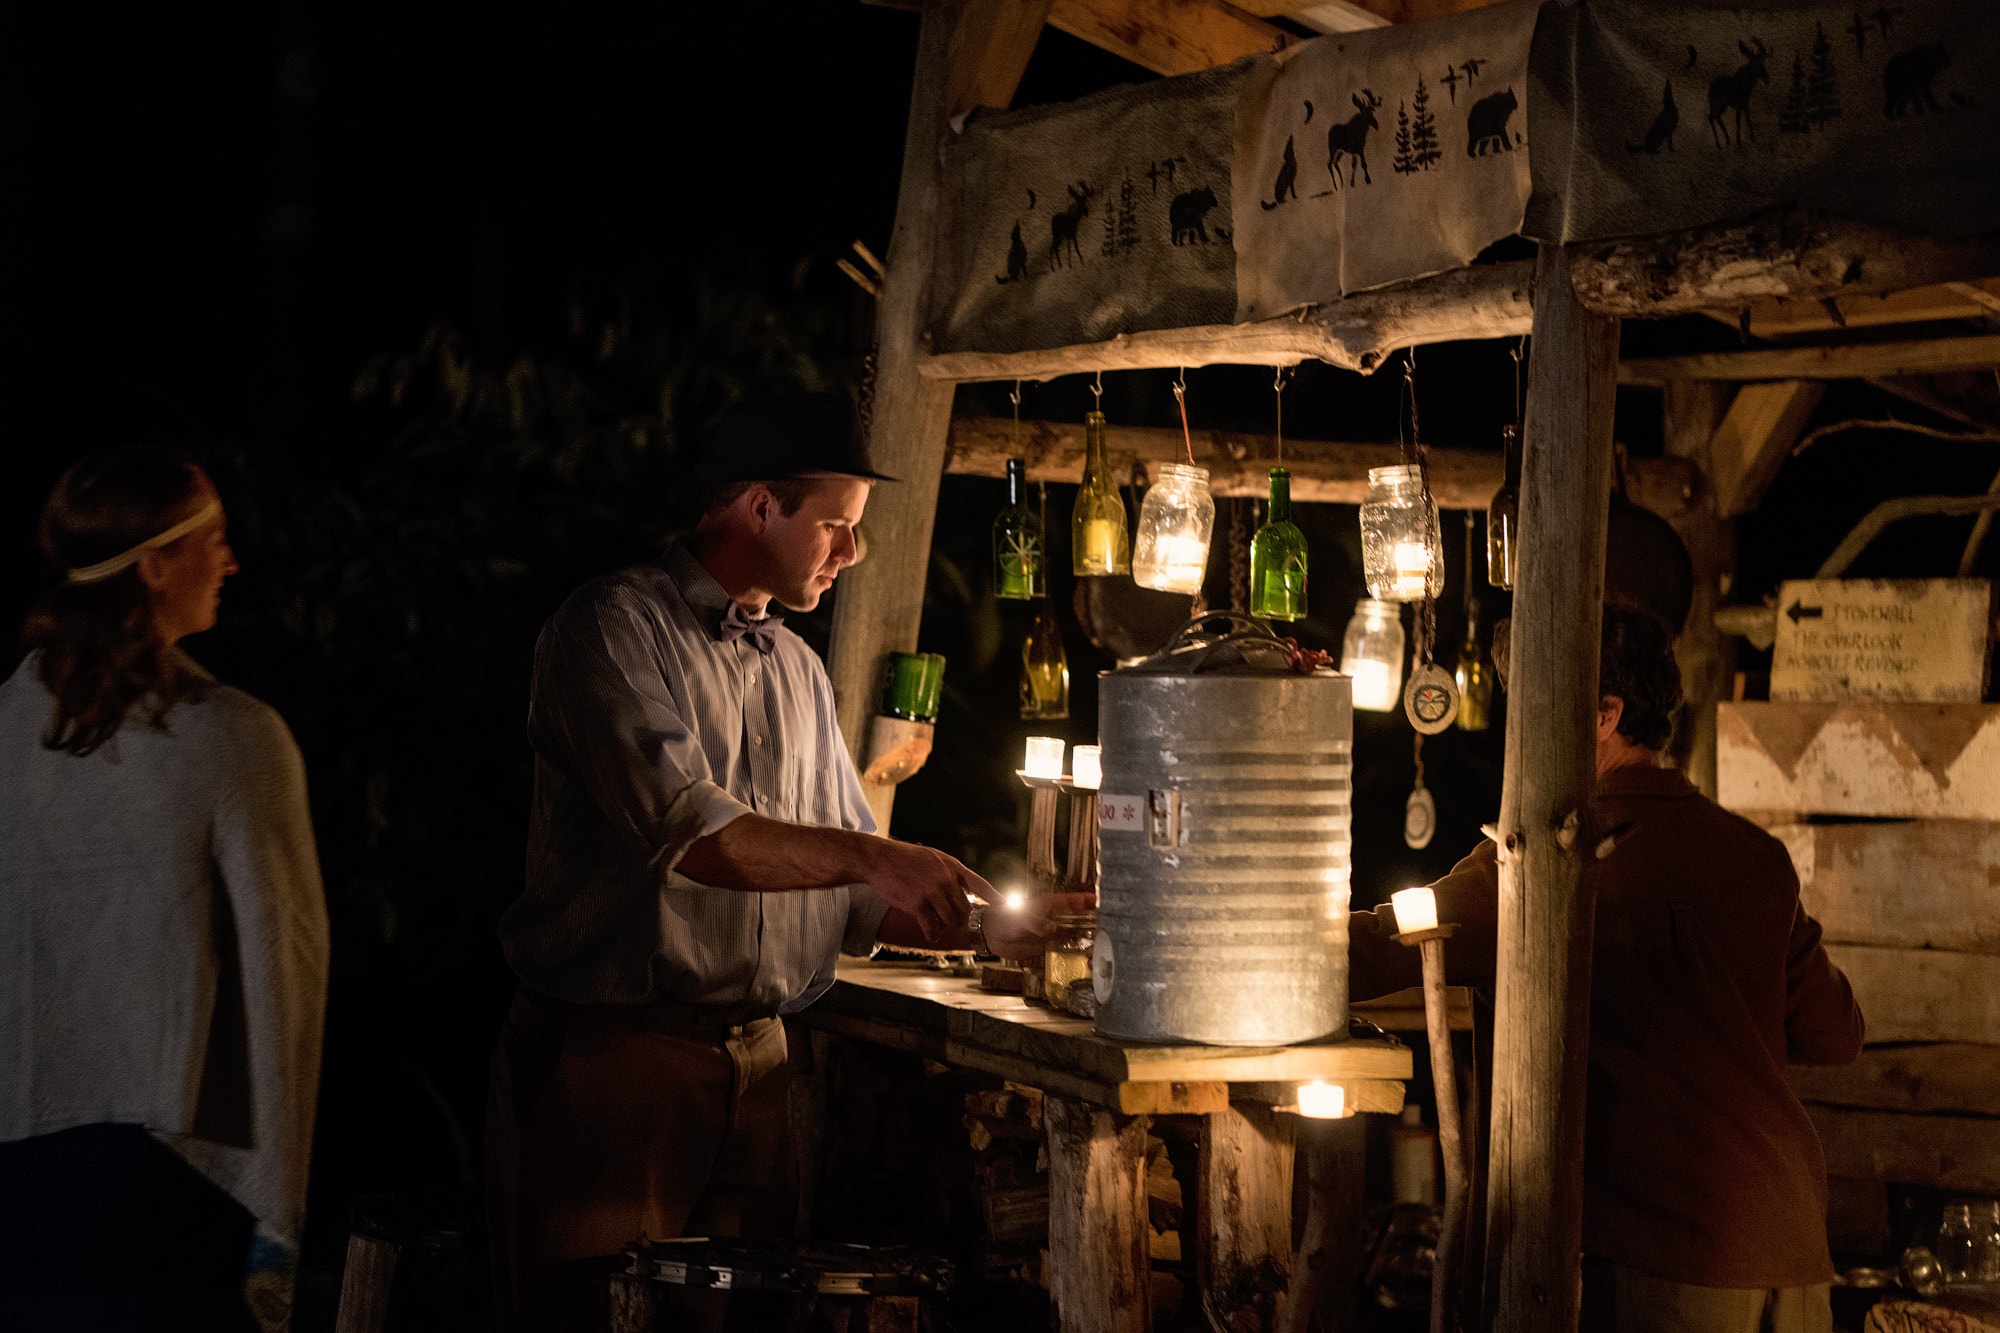
ISO 4000, f1.8, 1/15, shot on the Batis 85mm 1.8 lens. You can see movement in the lady on the far left of the frame as she was in motion at the time; but there is no camera shake in the frame.
We did have to add video light for a few shots, but it was dialed way down, and color balanced to match the fire and candles. This next shot is at 6400 ISO, but the settings are otherwise the same.
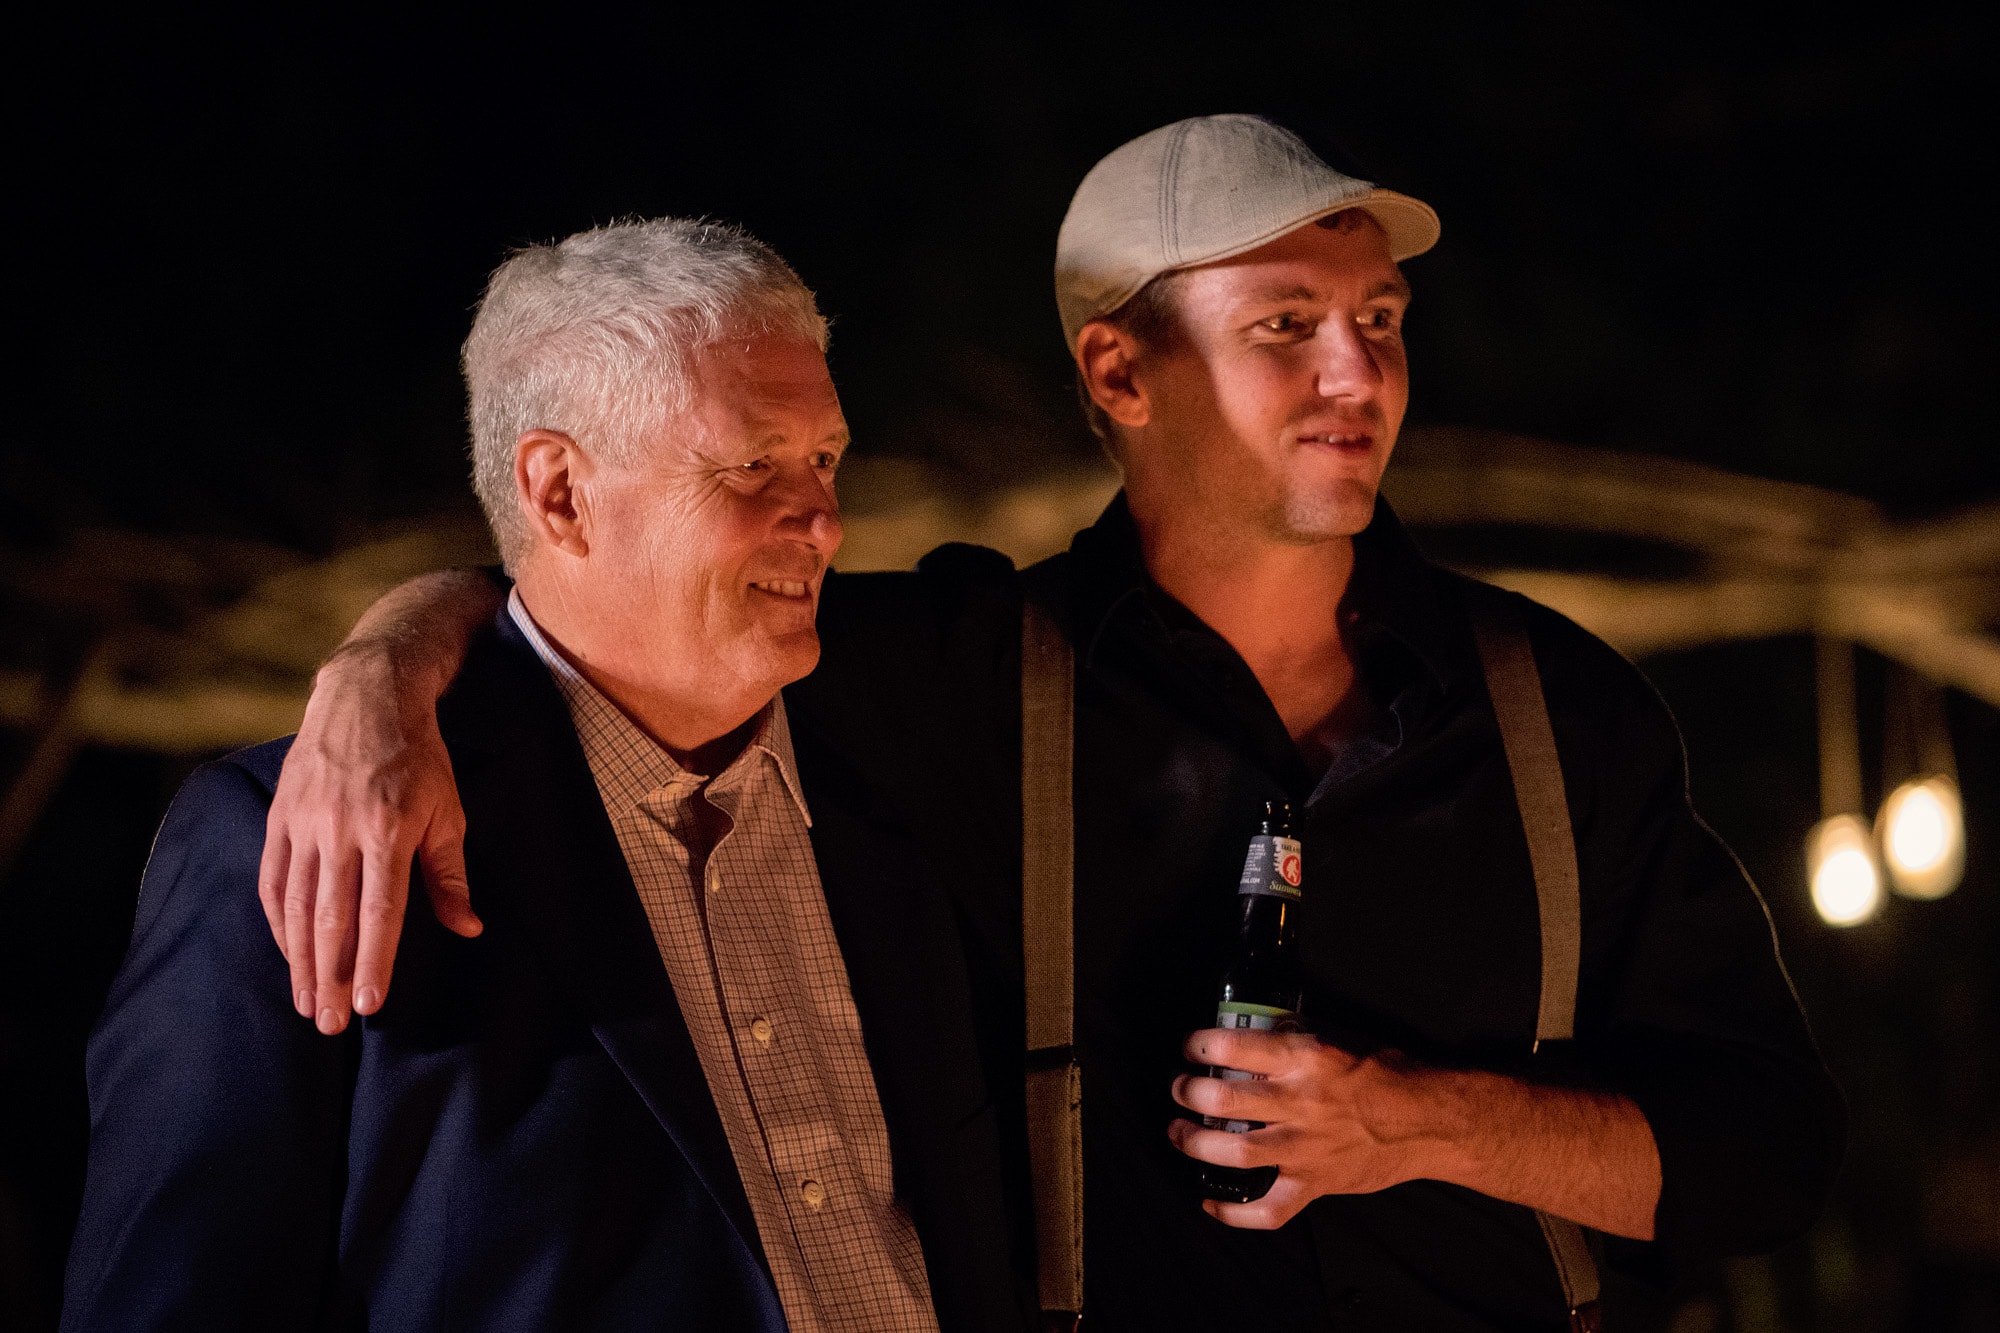
ISO 6400, f1.8, 1/15, shot on the Batis 85mm 1.8 lens.
Face Recognition and Eye-AF: I think DSLRs are finally getting in on this game, but it still blows my mind how quickly and accurately the Sony A9 can find faces and focus on them. I use this feature throughout the wedding day and absolutely love it. It’s much quicker than back button focusing, and because it’s also more accurate, I feel confident shooting wide open. This makes for prettier portraits, and less flash use at the reception, both things I’m very much enjoying.
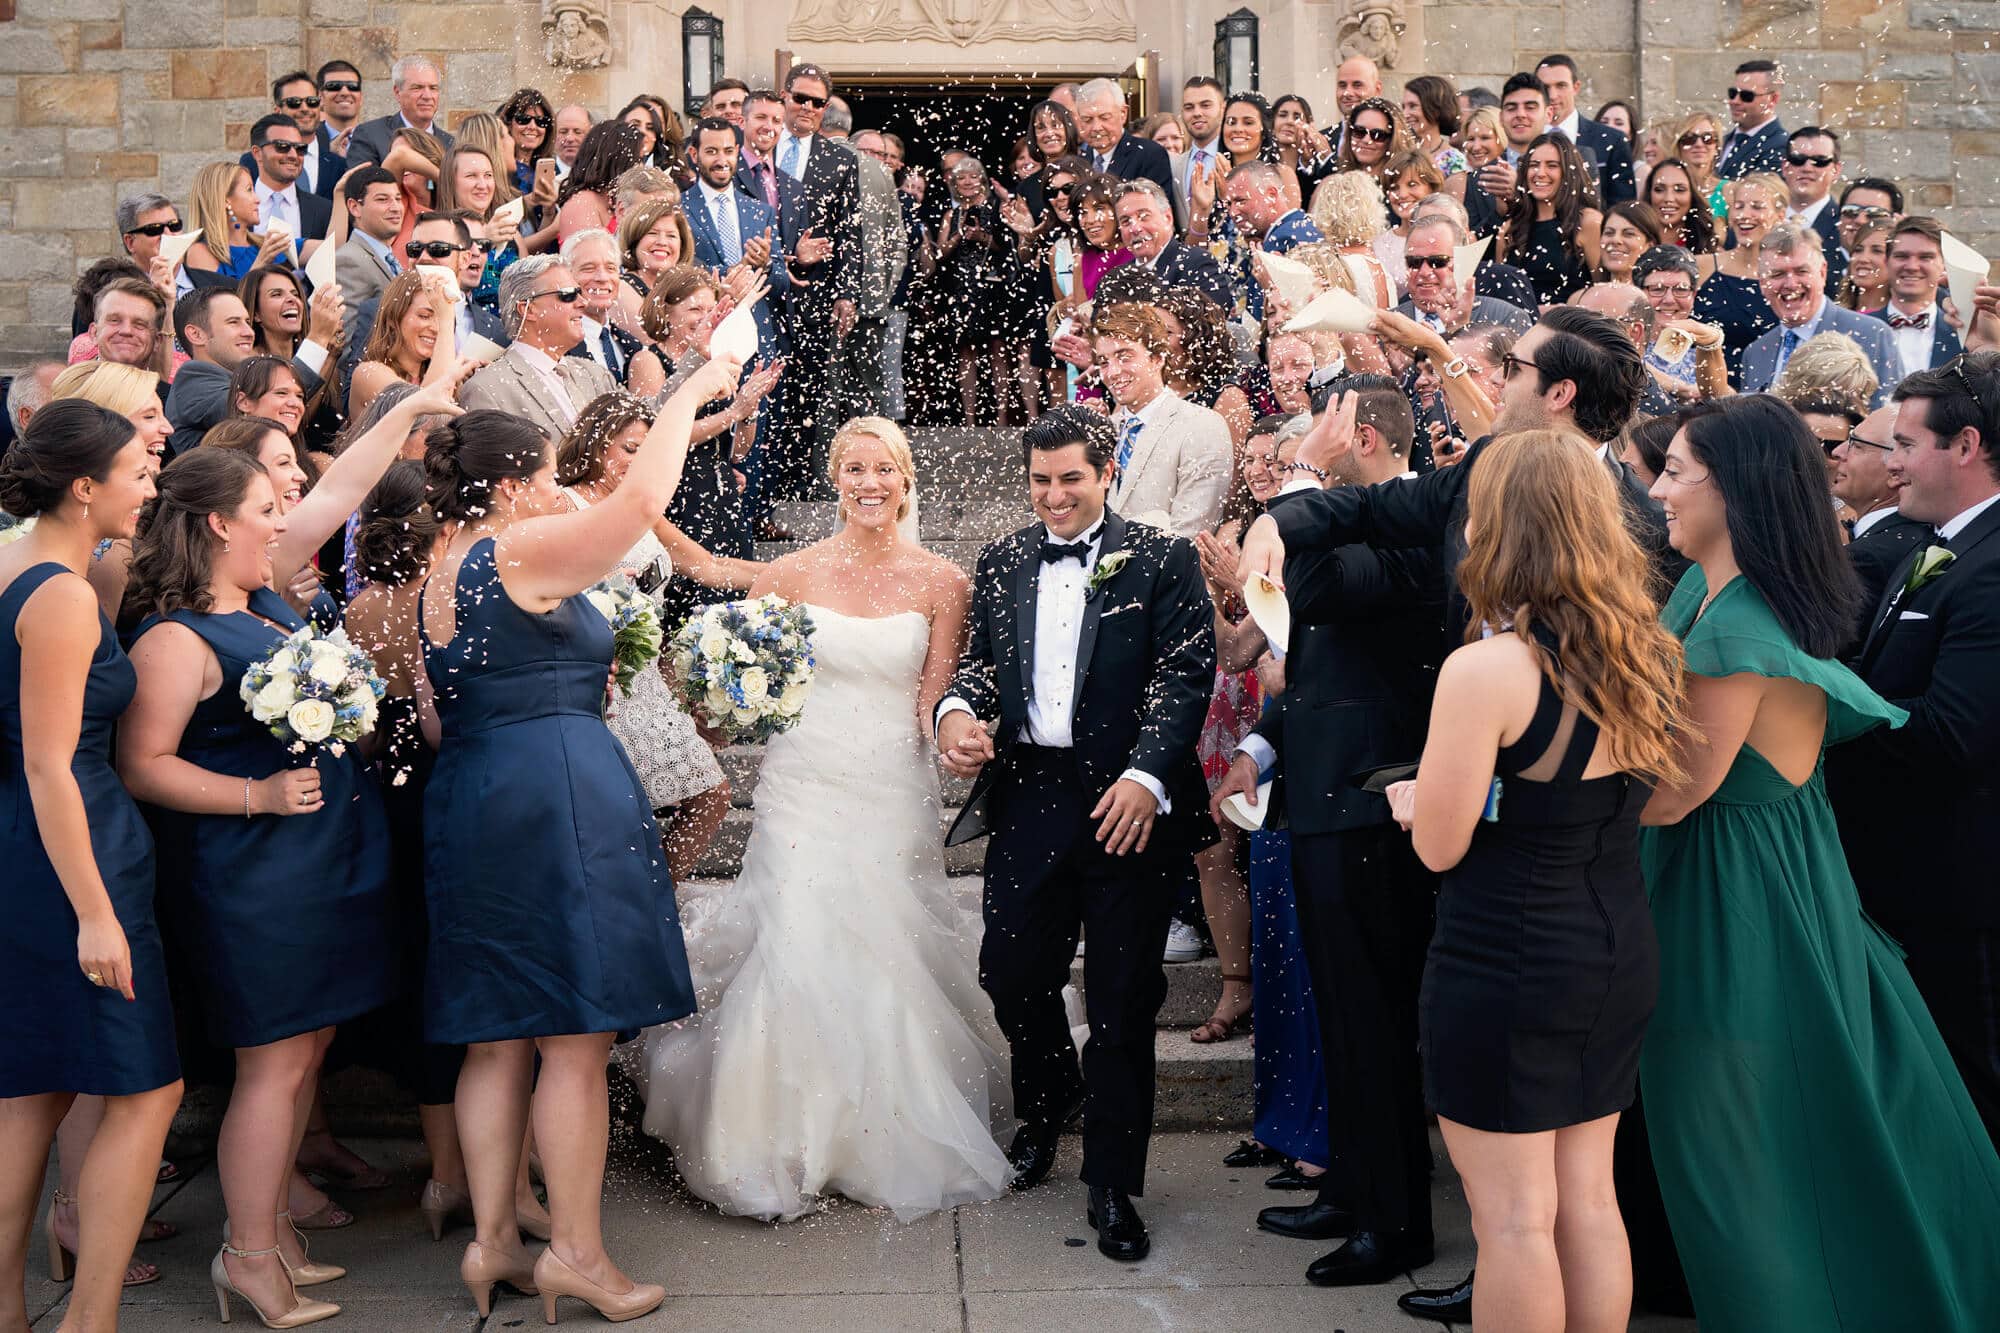
The face recognition and Eye-AF features really excel in tricky focus situations like this, where fine confetti is being thrown right in front of the bride and groom’s faces. My second shooter’s Nikon focused on the confetti; the A9 focused on the bride’s eyes.
It took me a little while to figure out how the camera chooses which face to focus on, so I’ll hopefully save someone reading this some time: it chooses the most central face within the selected focus area (wide, zone, etc.) that it recognizes as a face (mostly facing forward, or eye visible in profile view). It is useless for big hugs with buried heads, so I have back button focus set up for situations like that.
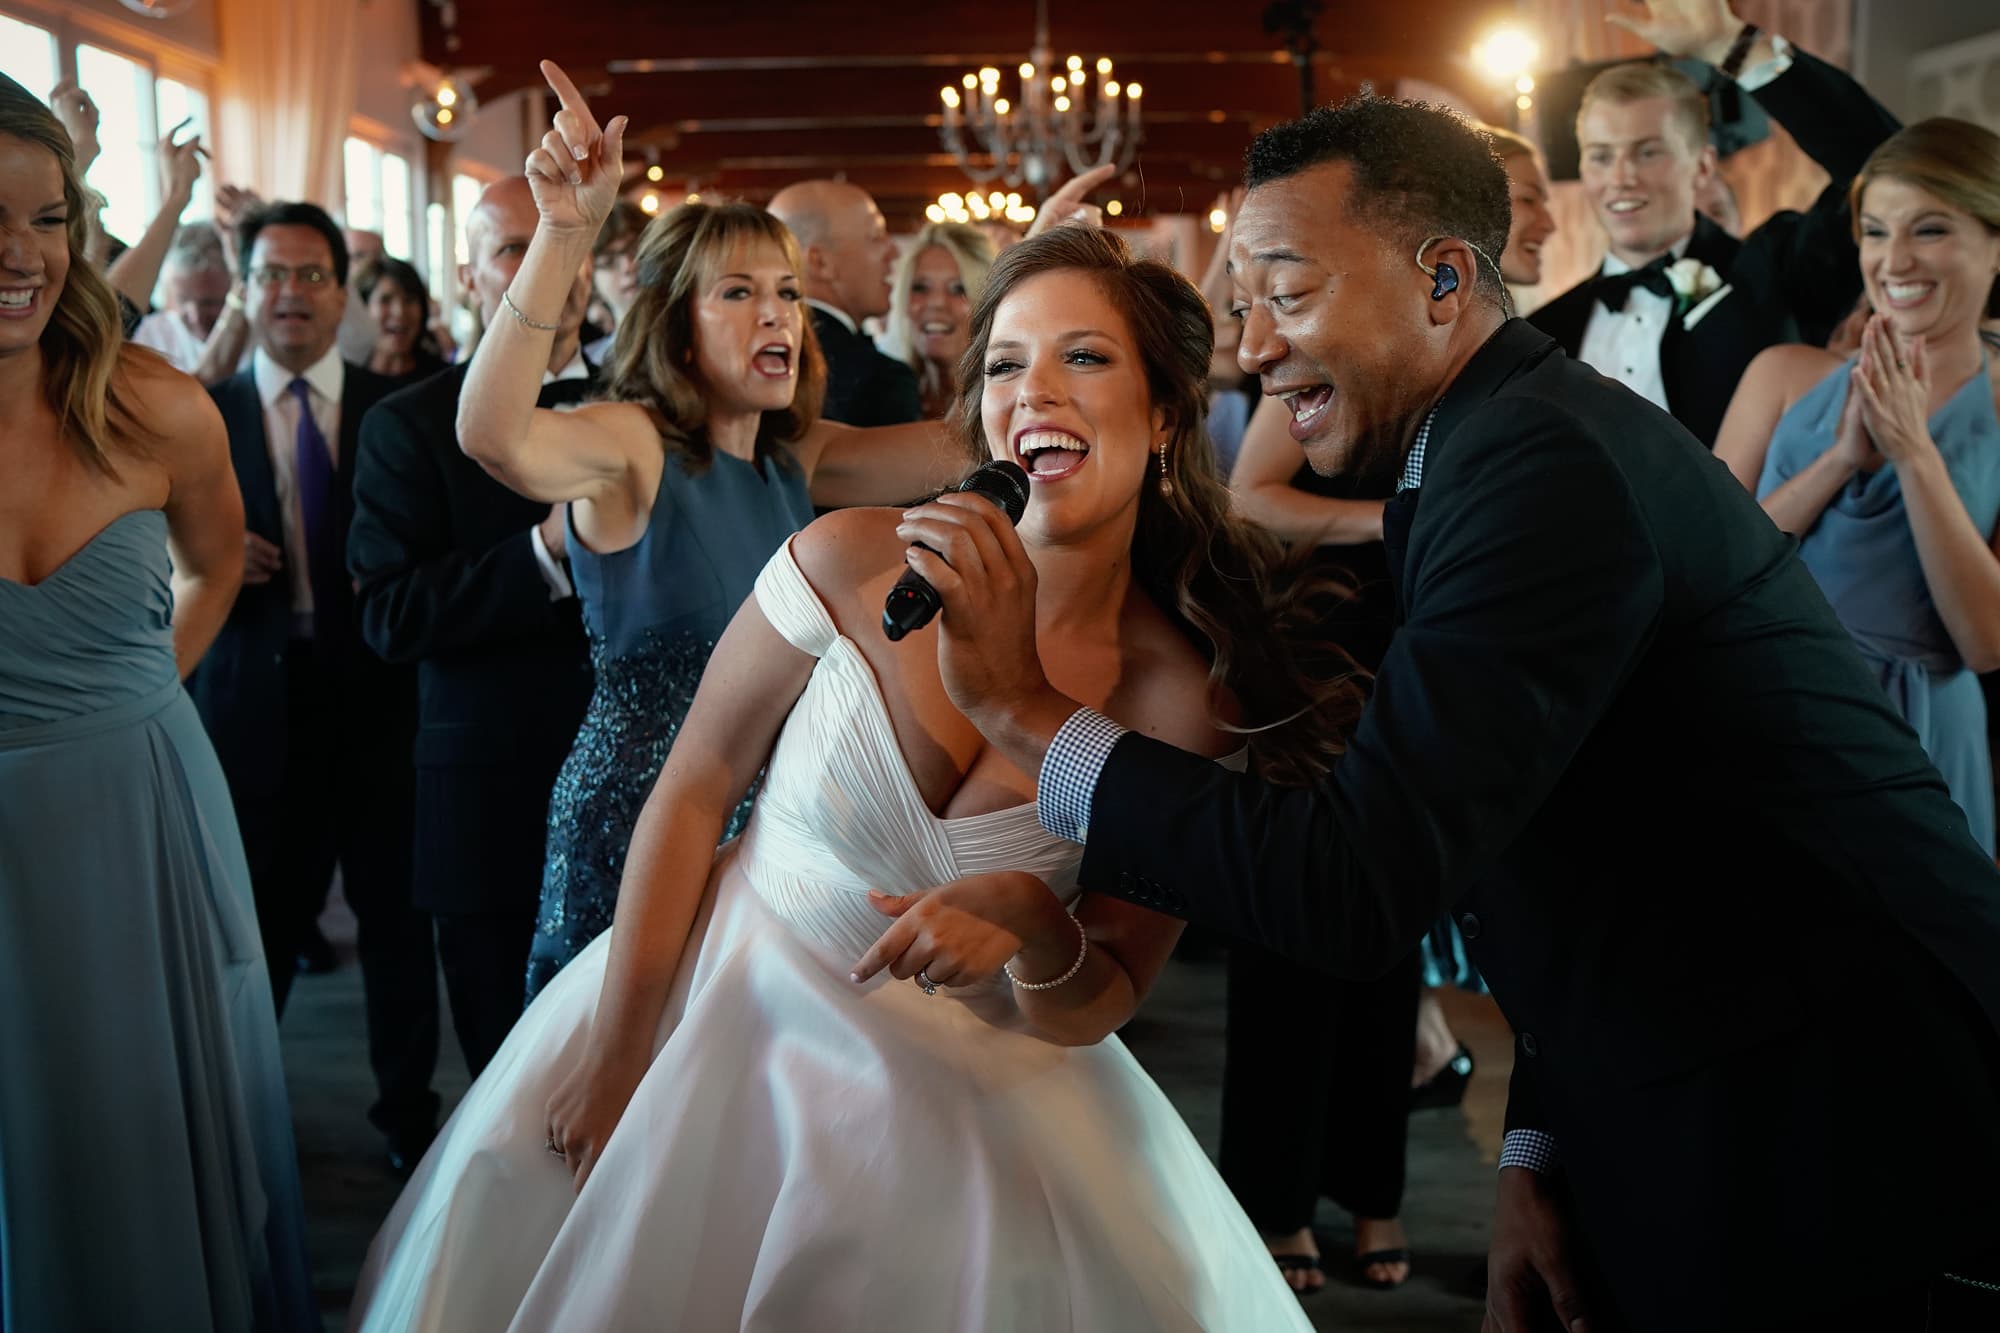
I wanted to capture the high paced action on the dance floor with natural light while we still had some, but it meant shooting at f2.8. Using Eye-AF I nailed focus on the bride, while she was moving, in a very busy scene.
If you want the focus to be on a face on the edge of the frame, and there are other people within the frame, you can either select a different focus area (e.g. in zone area you can use the thumb joystick to move the area) or you can do what I do and place the desired face centrally in your frame, and hold the shutter button halfway down as you recompose. It works like back button focus, except that the camera makes tiny focus adjustments to keep the face in sharp focus. This is especially accurate when used in conjunction with Eye-AF. I LOVE this feature.
After years of photographing using back button focus, I am used to having high anxiety right before and during the recessional and similar. No longer! Now I concentrate purely on nailing the perfect moment, as I know the Eye-AF and face recognition will take care of focus for me!
For processionals and similar, I picked up this tip from a videographer on YouTube: set the focus area to zone, make the zone top-center, and keep the subjects within that zone; faces in the crowd on either side of the focus zone will be ignored when there is a subject in the focus zone.
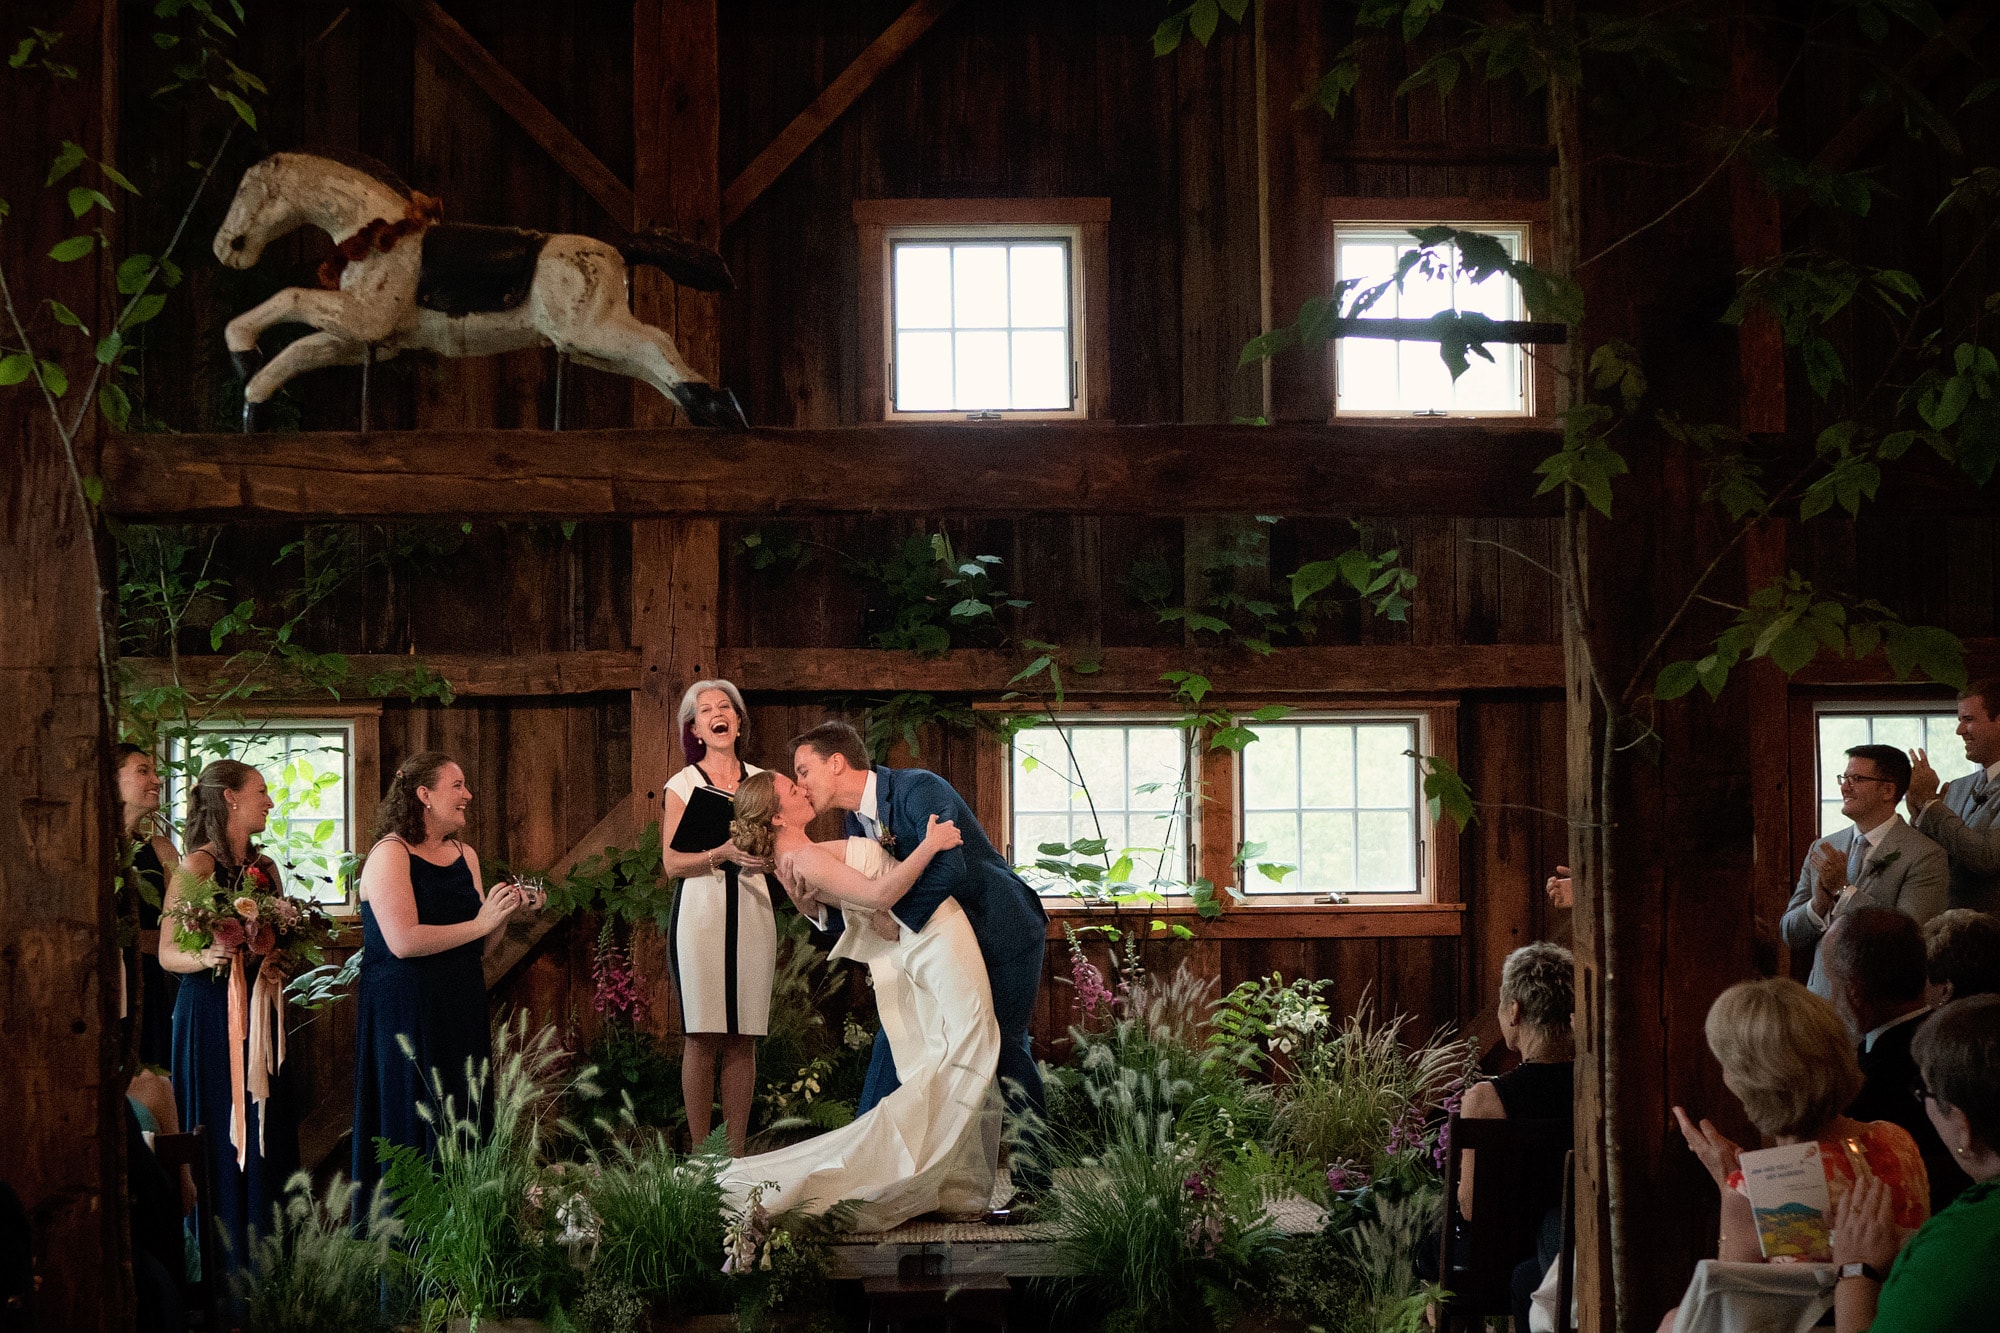
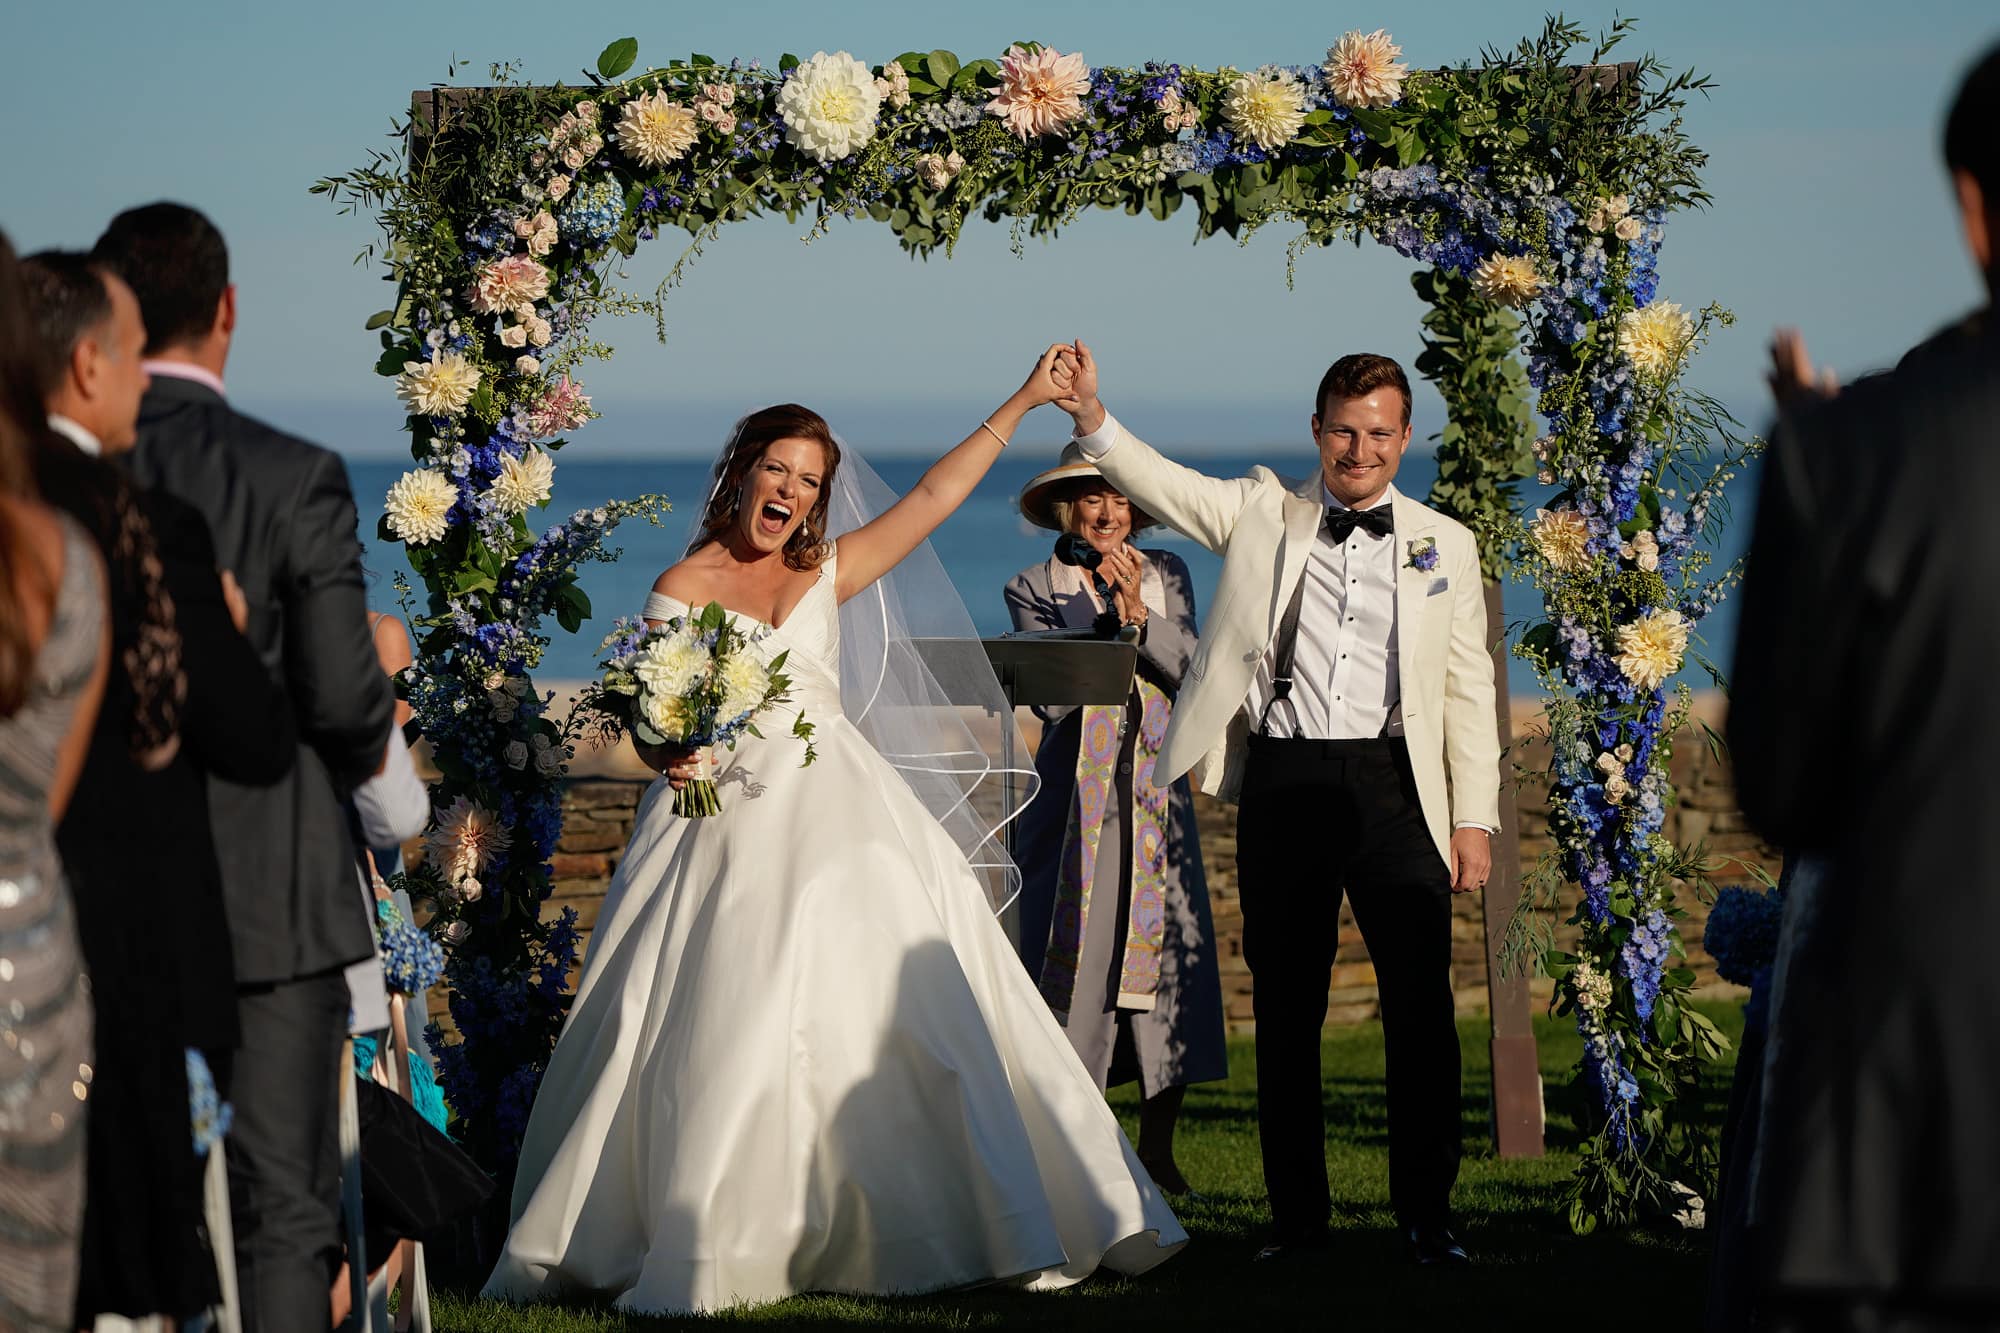
Ceremony inside on a gloomy, rainy day with just a hint of lighting? I had no qualms shooting at ISO 6400 for the entire thing, knowing that the A9 would bring out the beautiful colors of the flowers and greenery surrounding the couple.
Color & High ISO: The A9 is fantastic in low light and I’ve been pushing it to 6400 ISO on a regular basis; I was comfortable doing the same with my Nikon bodies. Where the A9 outperforms the Nikons however is in the color rendition at high ISOs; the RAW files retain much better color information at 6400, with the images being much more vibrant. The Nikon files look very washed out by comparison.
This is a straight out of camera RAW file, converted to JPEG, no editing. Shot at ISO 4000, f1.8. I am so impressed with the color! This is a really accurate representation of the scene, which was lit by Event Illuminations. Usually at higher ISOs the color is weaker: less colorful, more gray.
The straight out of camera JPEG files in normal situations are absolutely gorgeous, especially the color accuracy and sharpness.
Straight out of camera JPEG. The finished file was warmed up a little and cropped just a touch. But it could easily have been delivered as-is.
Auto Everything: My year-ago Nikon-using self is looking on in horror as I write this … but I’m pretty excited about how accurate the auto settings are on the Sony A9. I shot almost exclusively in manual exposure on the D750; I find that the A9 gets me where I need to be quicker and more accurately in Aperture Priority mode. So, I use it a lot, especially outside when there are clouds passing through, or I’m in and out of the shade. I have yet to find a situation where it hasn’t impressed me. If the lighting is consistent, I’ll dial in manual settings, usually after sunset.
The idea of letting the camera find the face is still a little unnerving, but again: it works. Astoundingly well. Why would I not use this tool to improve my photos? I know when to switch focus modes, when to use back button focus; but 95% of the time, I set the focus mode to wide, with face recognition set to on, and let the camera do the hard work for me. It’s quite liberating!
Speed & Accuracy: The Sony A9 is blazing fast. In terms of drive mode, it’s actually a little too fast for me – the lowest drive mode shoots at 5 frames per second. I wish this could be custom set, or set at something lower – 3fps would be ideal for me. That’s a small gripe though. It just means a few extra frames to cull through. The upside is that when you’re shooting through moments, you have a lot of options to choose from; you really can nail the moment each and every time. I leave it on low drive mode most of the day, as I’m usually chasing moments; however when I’m photographing details and rooms, I set it to single shot mode.
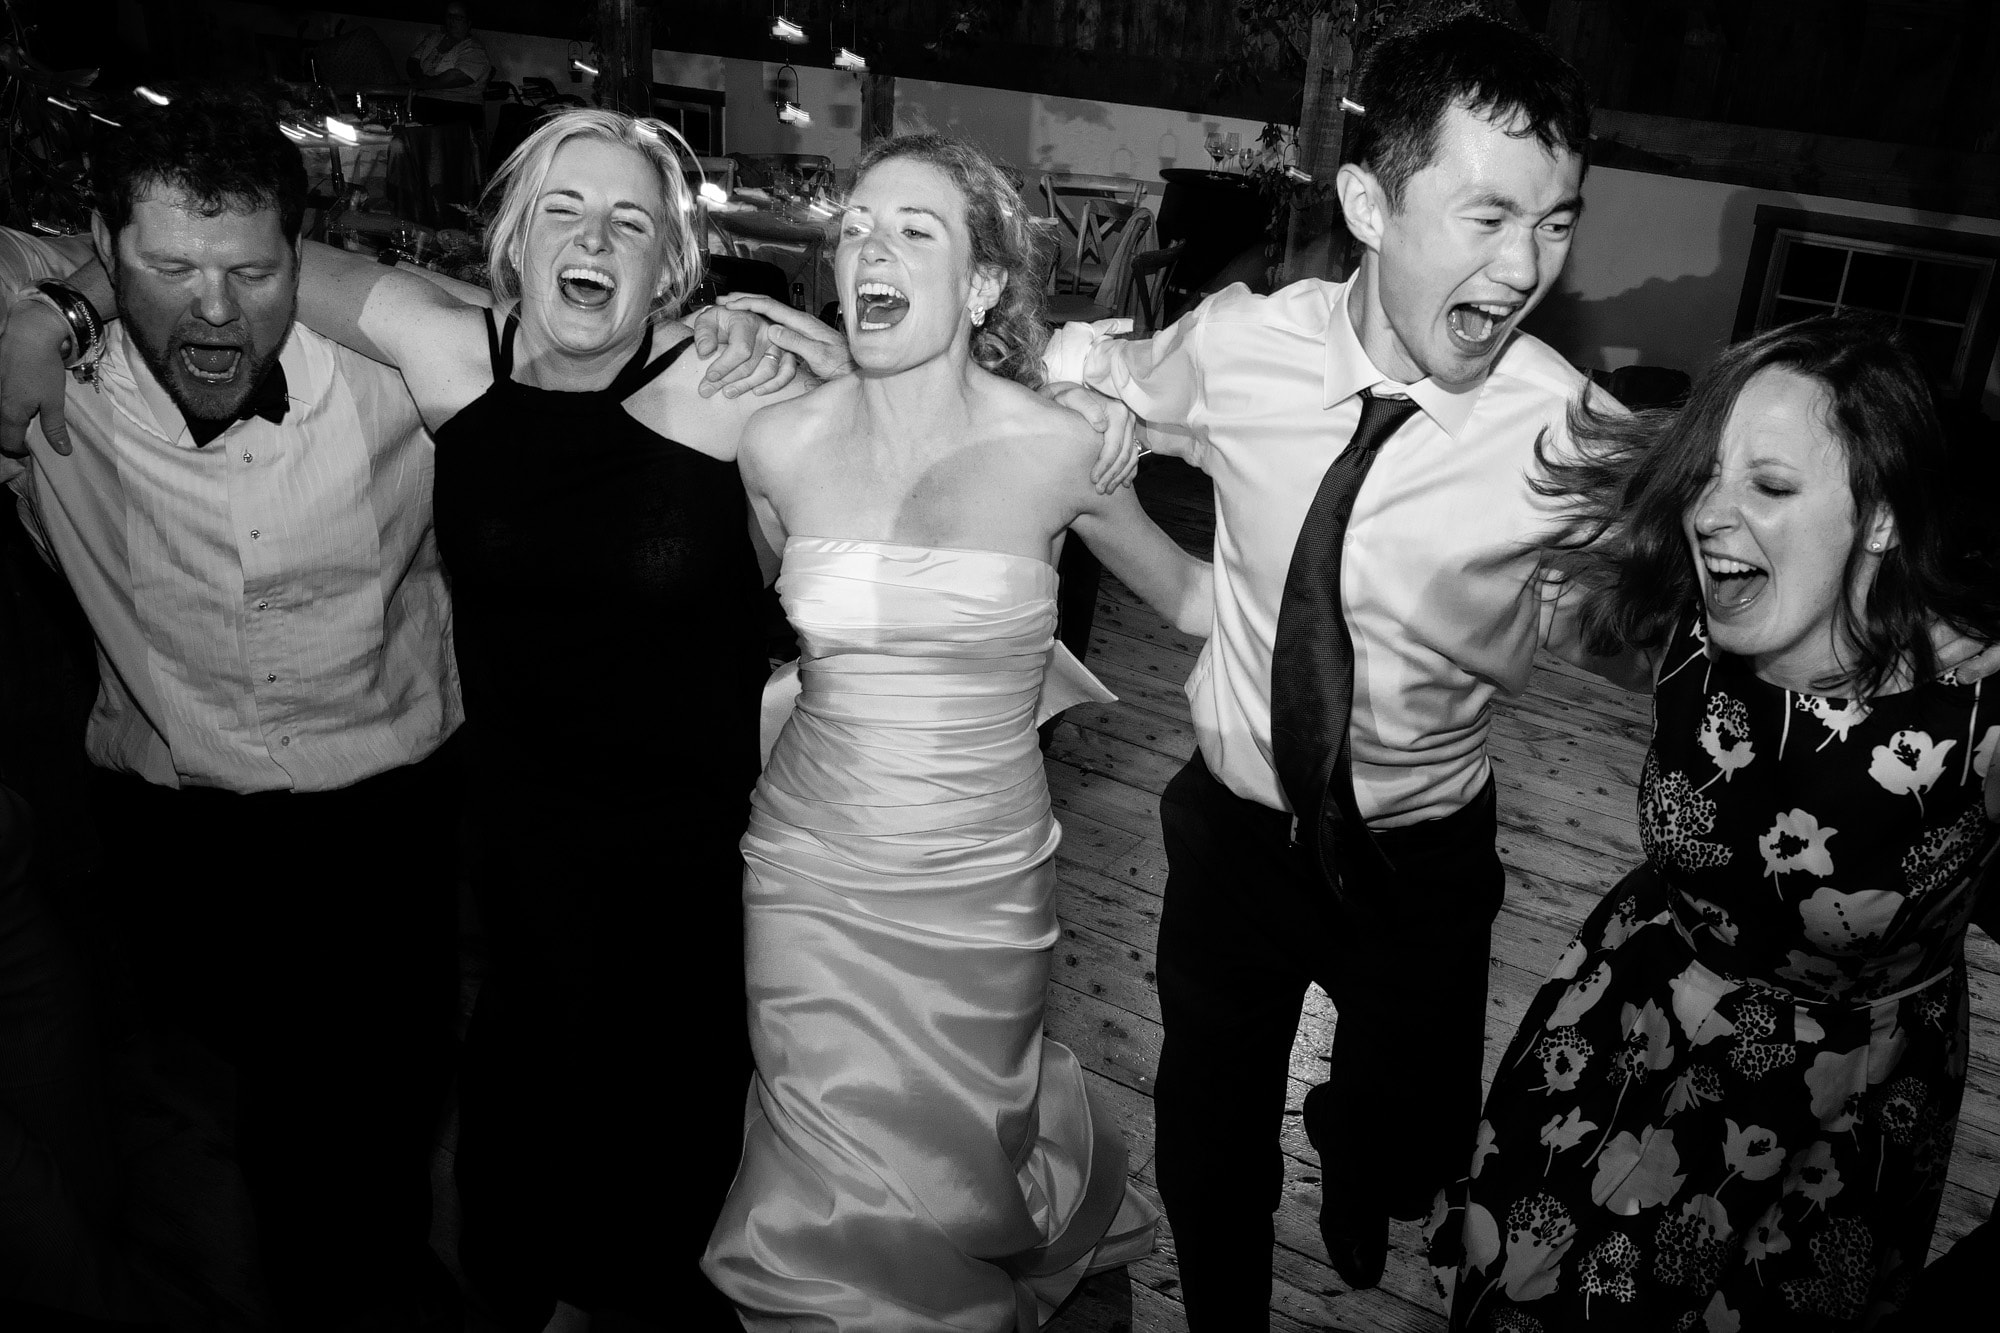
One of the hallmarks of my work is high energy expressions; the speed of the Sony A9 has made it even easier for me to nail these fleeting expressions.
The autofocus accuracy is astounding in good light, and in my experience at least on a par with the current Nikon bodies in low light. I recently had a very talented photojournalist friend second shoot with me at a recent wedding, him on the D810 and D500; I had a higher accuracy rate for focus throughout the evening – we were working with a very dimly lit reception room for the dance party.
When it’s really dark, face recognition stops working well, and I typically switch it off for the dance party portion of the night. In zone or wide mode, and face recognition off, autofocus works fine for me on the dance floor. Others have reported less than stellar results. Maybe because I typically didn’t use the AF beam on my Nikons I have lower expectations here. I’m more than happy with a hit rate of 1 in 4 for dark and fast moving dancing photos (and I’ve always shot a lot to compensate for this).

It was really quite dark here, and face recognition was still working great. ISO 5000, f1.4, 1/60. It has to be almost pitch black to stop working entirely.
What’s not to love?
The only real teething area for me has been flash. I started by using the tiny TT350 flashes by Godox. They are adorable, tiny flashes, and I loved how little extra weight they added. Unfortunately, I found that they weren’t keeping up with the camera, and in retrospect seemed to be slowing it down. I switched almost immediately to the much larger and more powerful Godox V860ii flashes, and have had no major issues since switching. The TTL seems to do a better job than my Nikon speed lights, and the system is quick and easy to learn. These flashes have large lithium batteries, and last really well even at higher power using medium or low drive mode. I keep a backup battery ready for receptions with long horas, so I can switch out right after, but otherwise they last throughout the hour or so that I’m there for dancing.

Shot in mechanical shutter mode with on and off camera flashes. This was from a burst, and it worked out just fine.
The biggest issue with flash is that I have to use mechanical shutter mode; the Sony A9 is an incredible machine in electronic shutter mode; in mechanical it feels sluggish. It’s no more sluggish than a Nikon D750, but it’s still disappointing. Luckily, this impacts so little of the wedding day that to me, it’s no big deal. If I used flash for larger portions of the day, the switch from Nikon to Sony wouldn’t have been as worthwhile, and I’m sure I would have stayed with my trusty D750s.
If you typically use burst mode for dancing photos, you also need to know this: in mechanical shutter mode, and medium or high drive mode, the EVF no longer shows the scene you are photographing, but instead flashes up with each photo that is shot. I rarely use drive mode when shooting the dance floor, and when I occasionally do, I set my composition and shoot a few frames, then move on. However if you rely on seeing exactly what’s going on while you’re shooting bursts, this will either take a lot of getting used to, or may be a deal killer for you. Again, it depends on how you shoot this part of the day; for my style of shooting it’s a non-issue.
Another flash/mechanical shutter shot. I’m still able to compose and focus just fine. It’s really not much different to my D750 on the dance floor.
Video on the Sony A9
I’ve been playing around with video of late, and I’m considering offering family documentary video sessions. The bad news is that Sony didn’t include picture profiles on the A9, so you can’t shoot s-log. This is a serious bummer if you grade your footage (it’s like not having RAW capabilities for stills photographers). However, I did a test video shoot with it anyway, as I wanted to see if the autofocus was as impressive in video as it is in photos. Short story: the A9 is pretty damn awesome for video, IF the lack of s-log isn’t a deal-breaker. I was still able to add a very light grade on top of my footage, and it ended up looking pretty close to how I would have edited footage from the A6500 to look. So for me, no big deal. I’d rather have the additional capabilities of the A9 for video work.
Any questions?
My apologies that this has been such a long post – and let me know if you have any questions about the Sony A9. Overall I absolutely love this beautiful beast of a camera, and highly recommend it to those that enjoy mirrorless systems. The learning curve is quite large – as it is if you switch between DSLR brands – but I have been shooting Sony mirrorless cameras for several years already for personal work.
0 Comments